Blower Motor Custom Replacement for A/C equipped Rabbit Pickup
The blower motor stopped working in my A/C equipped Caddy and I didn't realize what I was in for. I quickly found that there are big differences between A/C equipped and non-A/C equipped systems. Here's how I solved it.

Before I dig into all of this, I'll say that this is just how I solved this problem. It's not a plug and play solution and it does involve a little fabrication. That's ok though because most of us in the VW community are used to this sort of thing. I wanted to create a detailed writeup on it with pictures that you can actually see because I couldn't find any solutions online for this issue other than simply finding a replacement motor and I thought maybe this will help someone else out there too. I wanted a brand new motor and resistor and I was determined to figure out a way to make that happen.
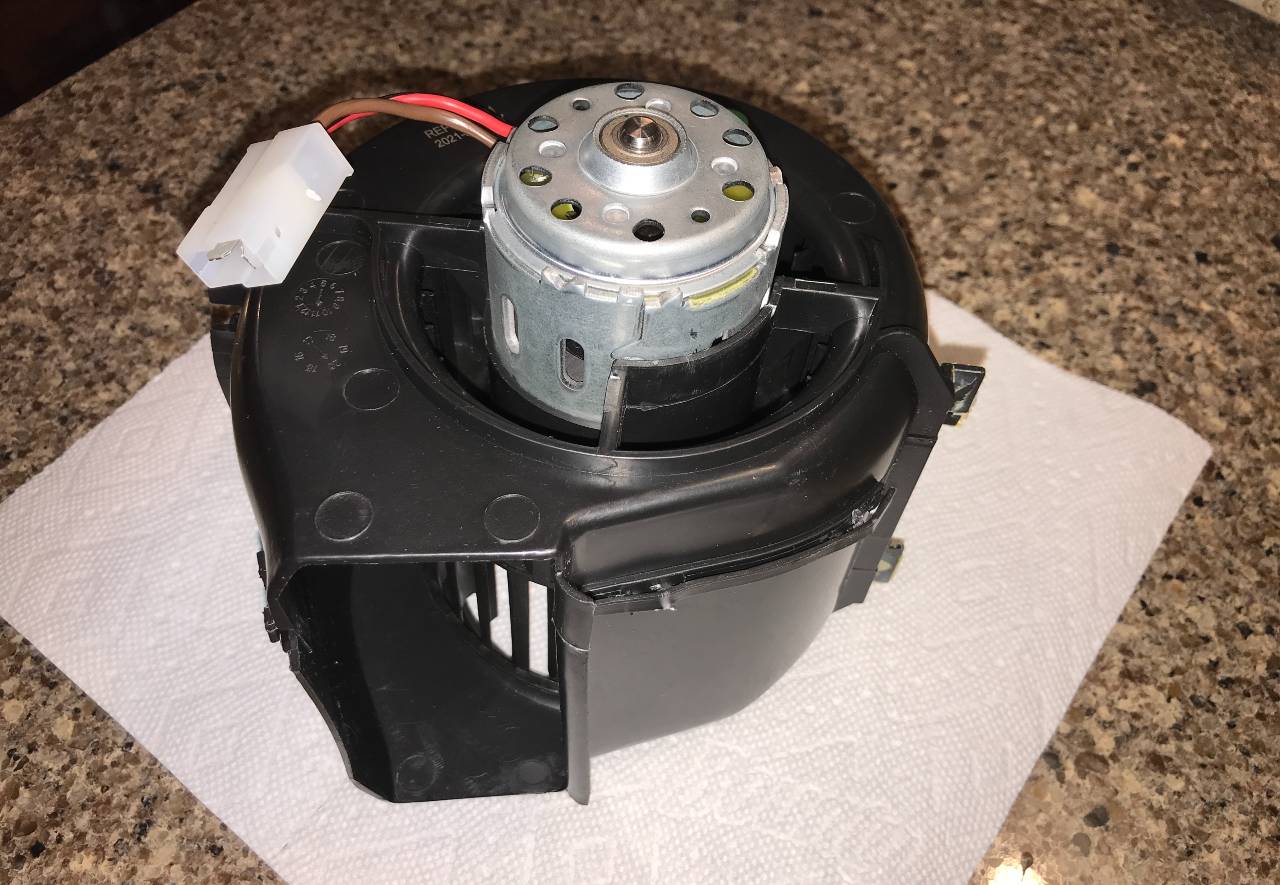
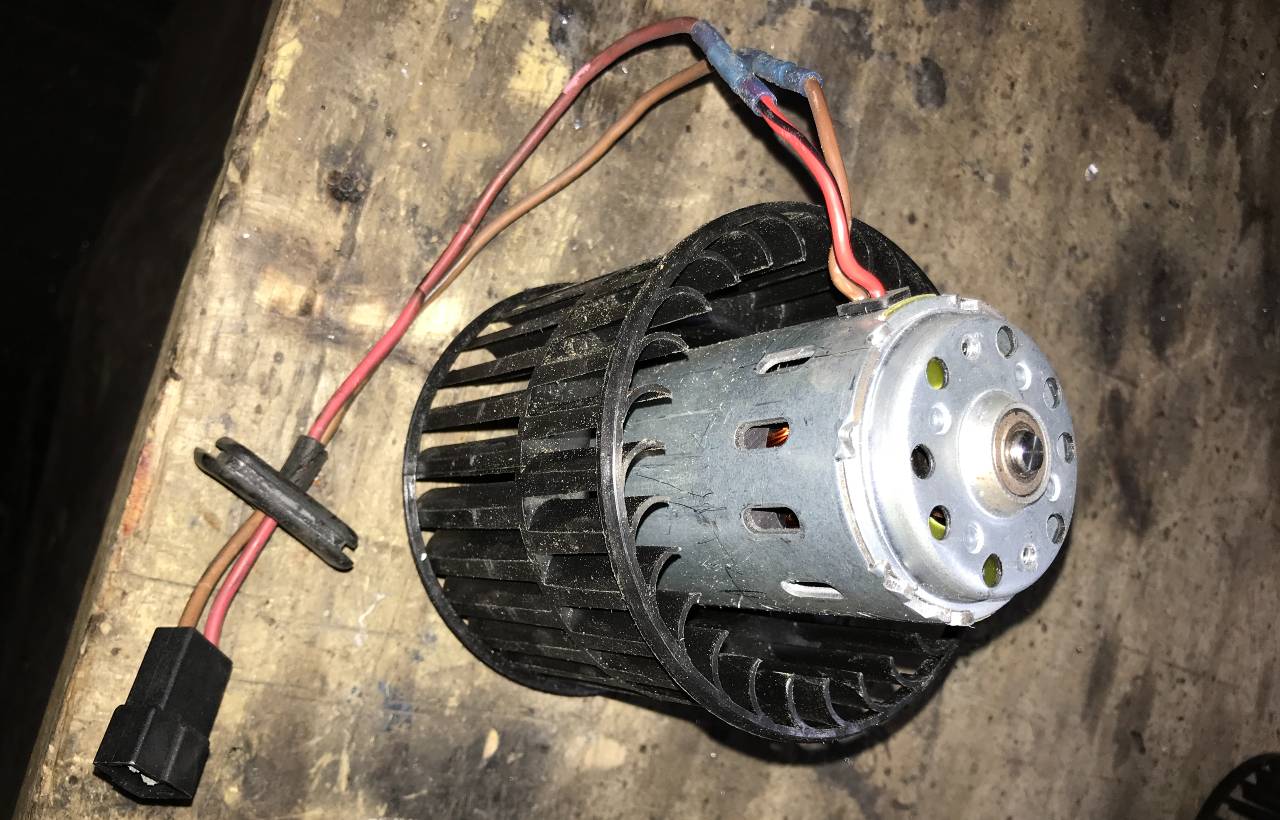
As a quick preview, this is what I made:
The New Motor
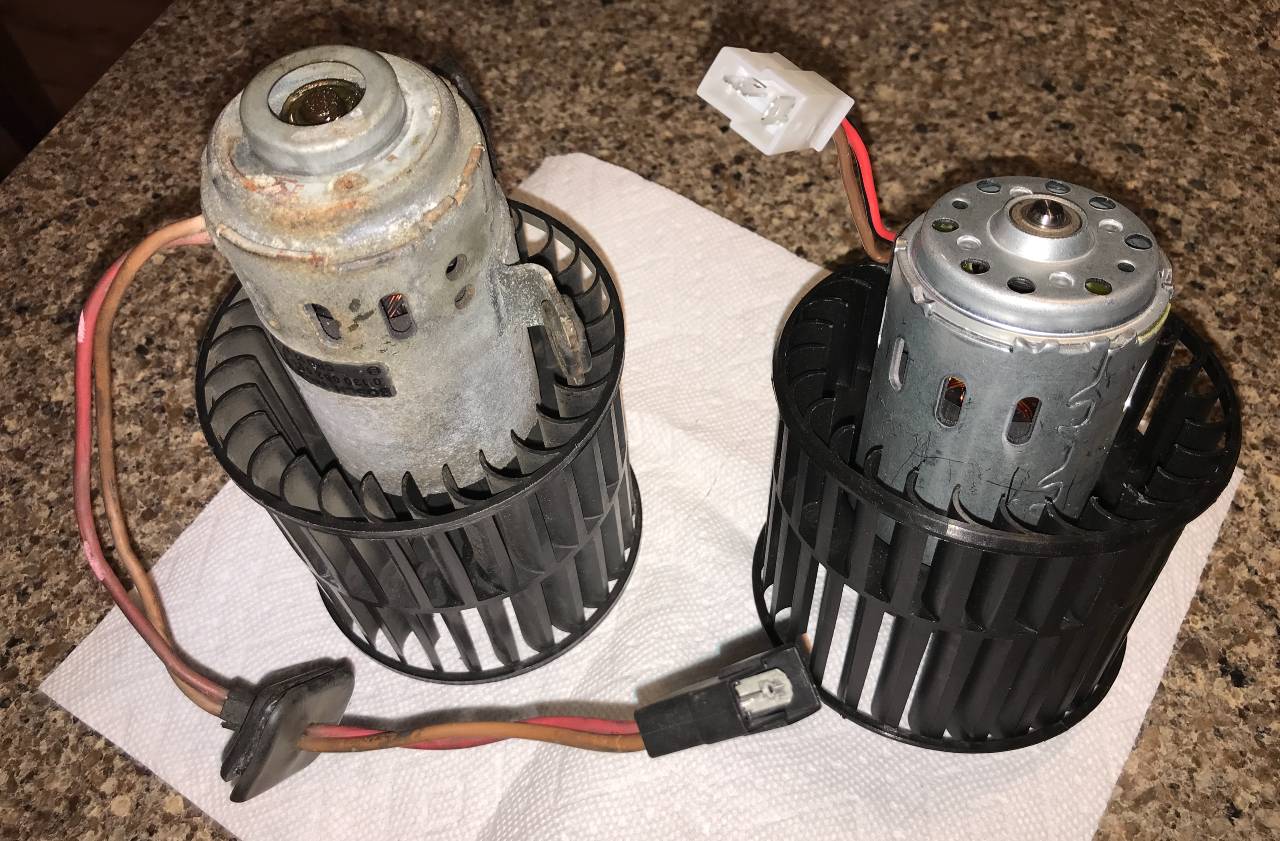
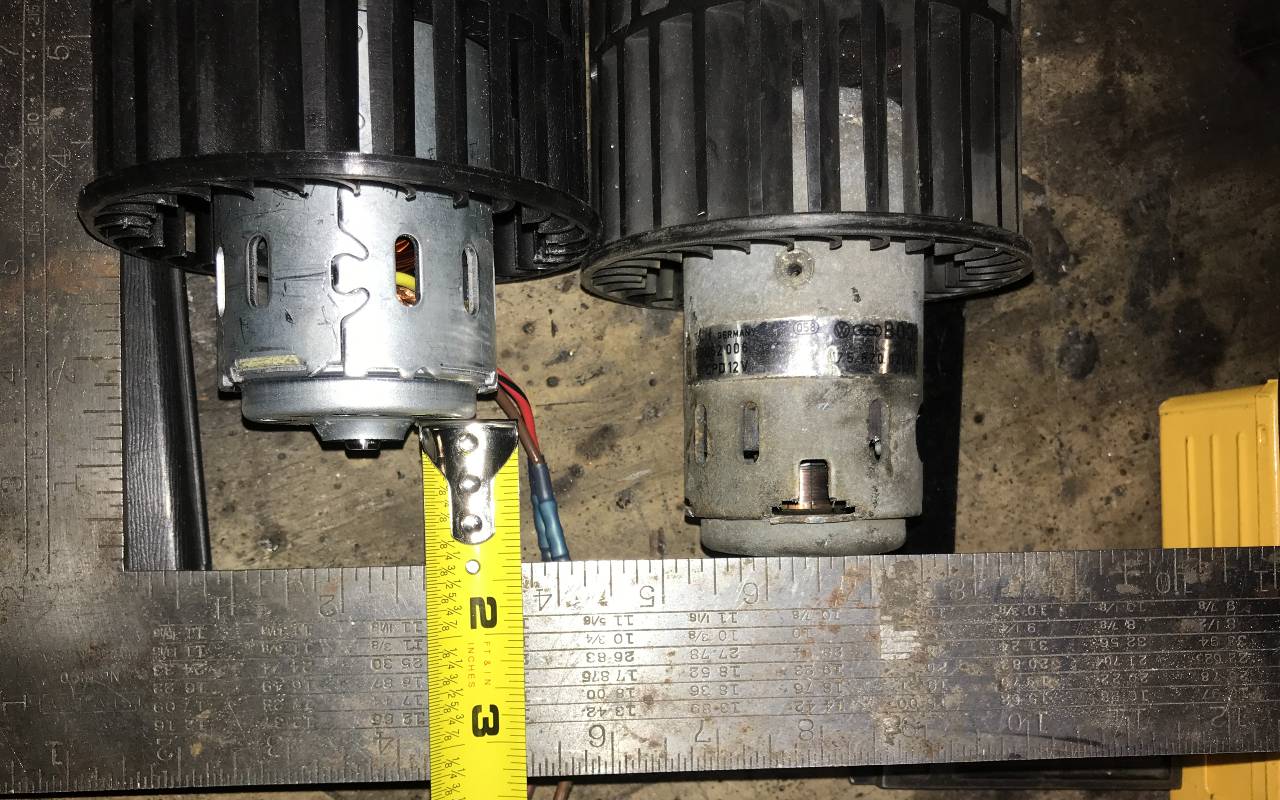
It doesn't take long to realize that a blower motor for a non-A/C Rabbit is completely different than one for an A/C Rabbit. For the non-A/C blower motor, the fan wheel is a little narrower, the motor housing sits deeper into the fan wheel and the motor itself is shorter. It is, however, the general size and shape that is needed, the wiring is the same and you can find them online all day long for cheap. I snagged one on ebay for around $45.00.
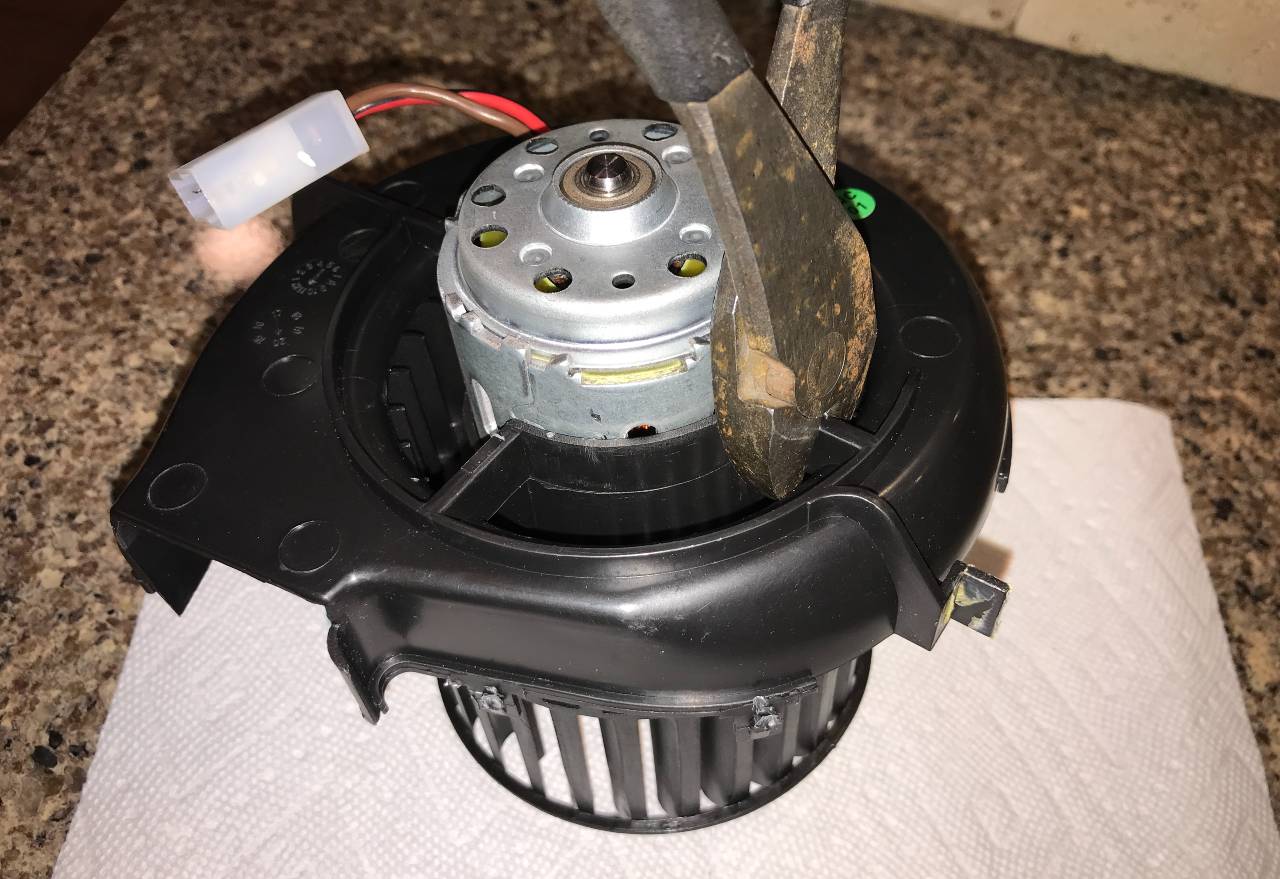
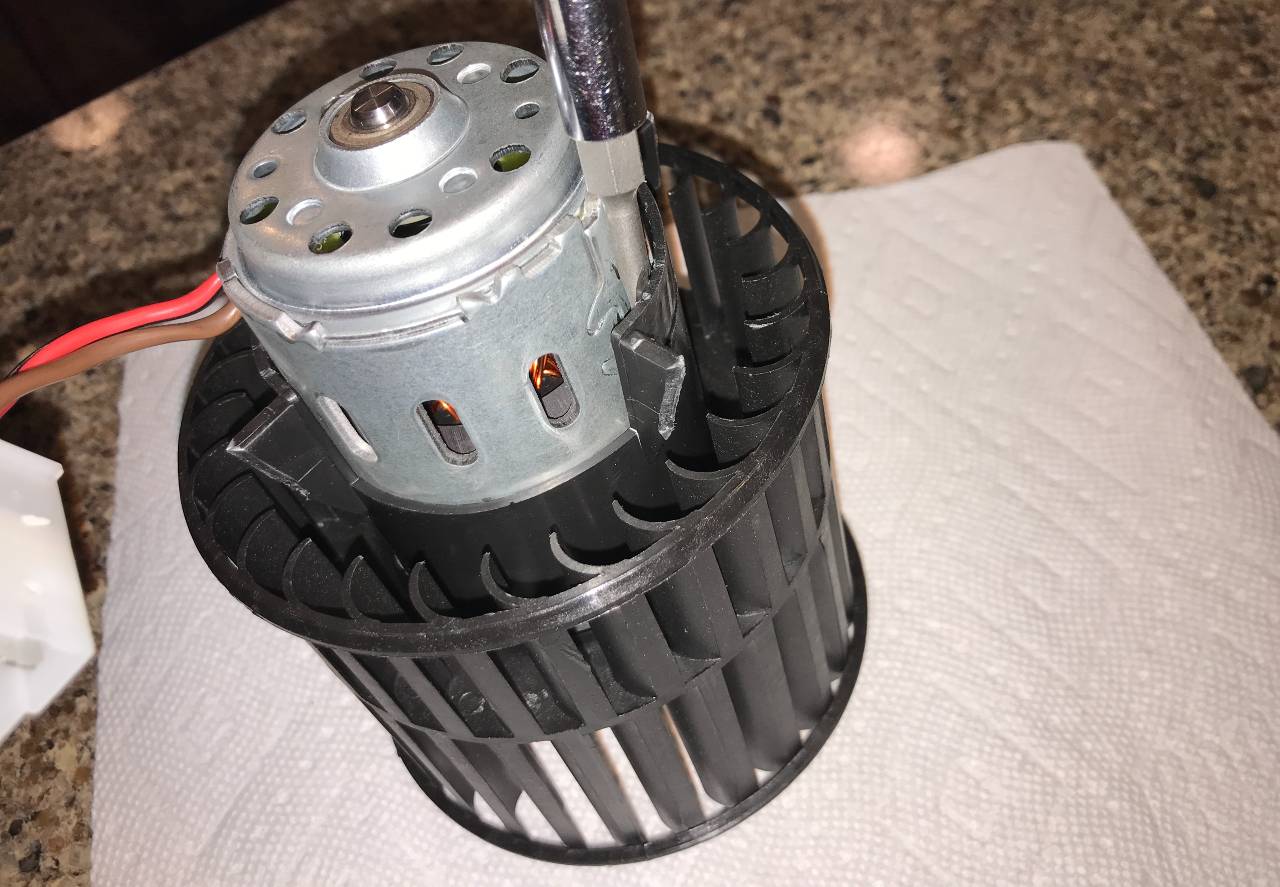
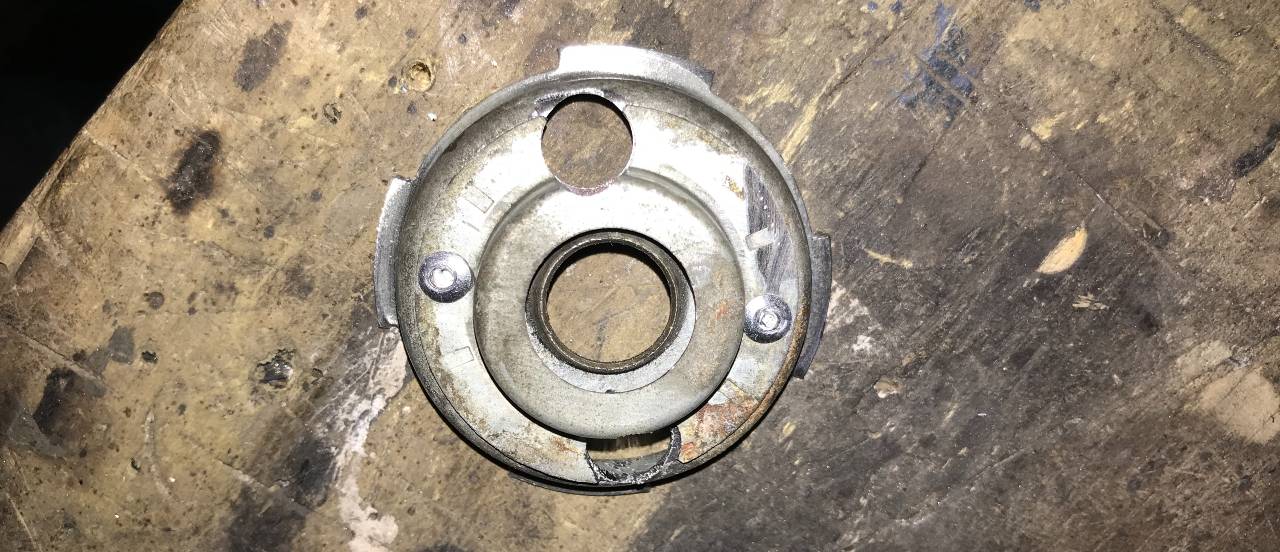
What I did first was remove the housing from around the fan. I broke the tabs along the middle seam and separated the halves. I then cut the four plastic tabs around the motor with some side-cutters. Once cut, I pulled the motor out of the second half of the housing.
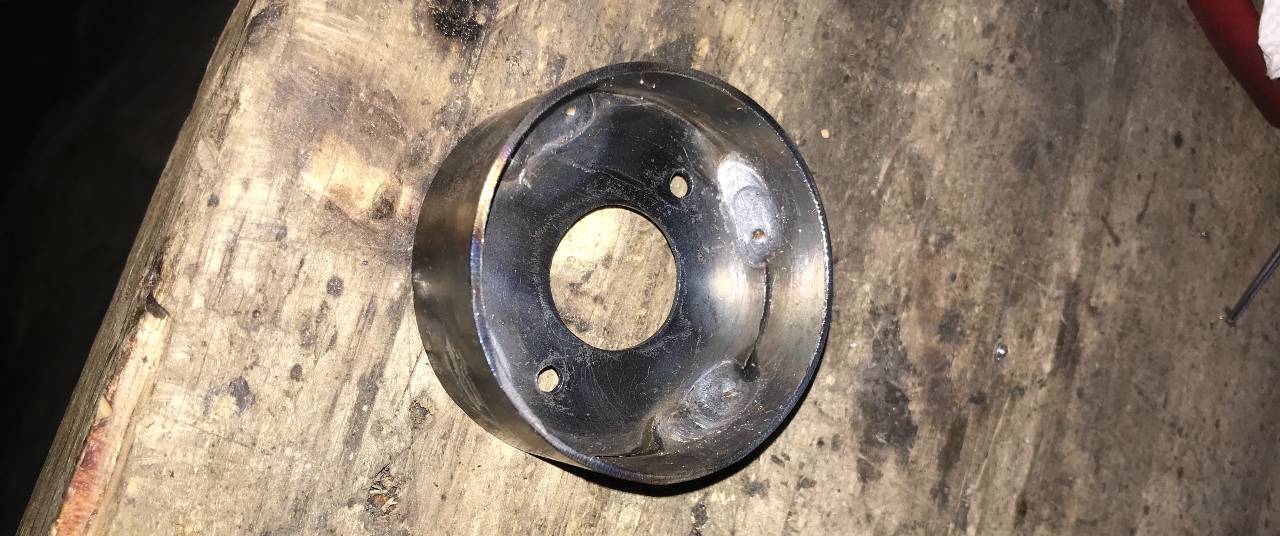
I then broke away the remaining surround from the motor with a screw driver.
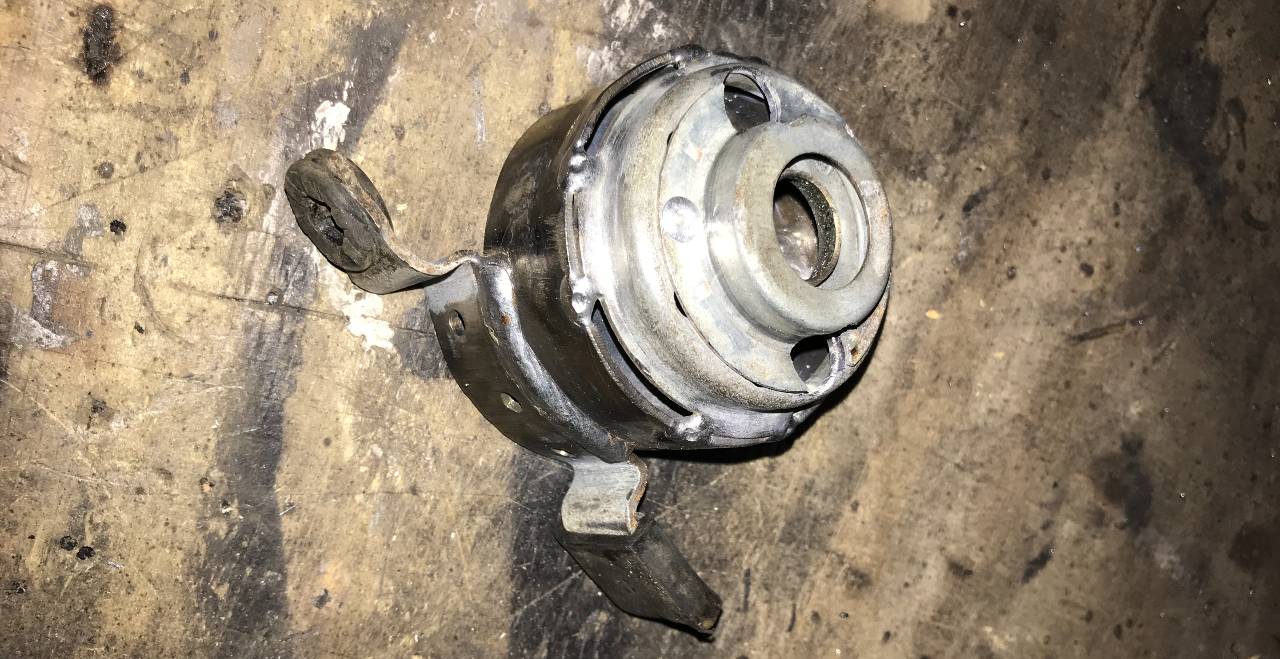
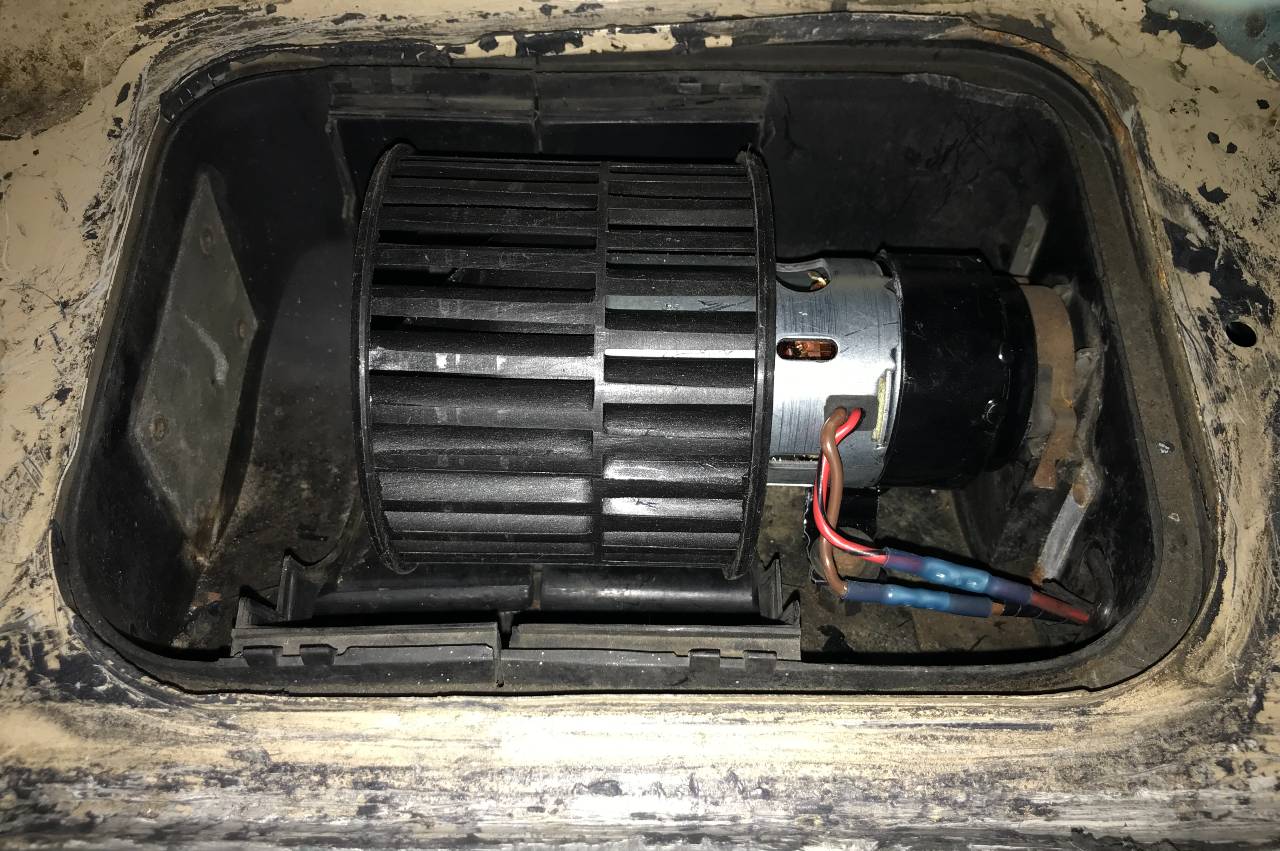
We now have a bare motor similar to the A/C blower motor and something to work with.
The Mount
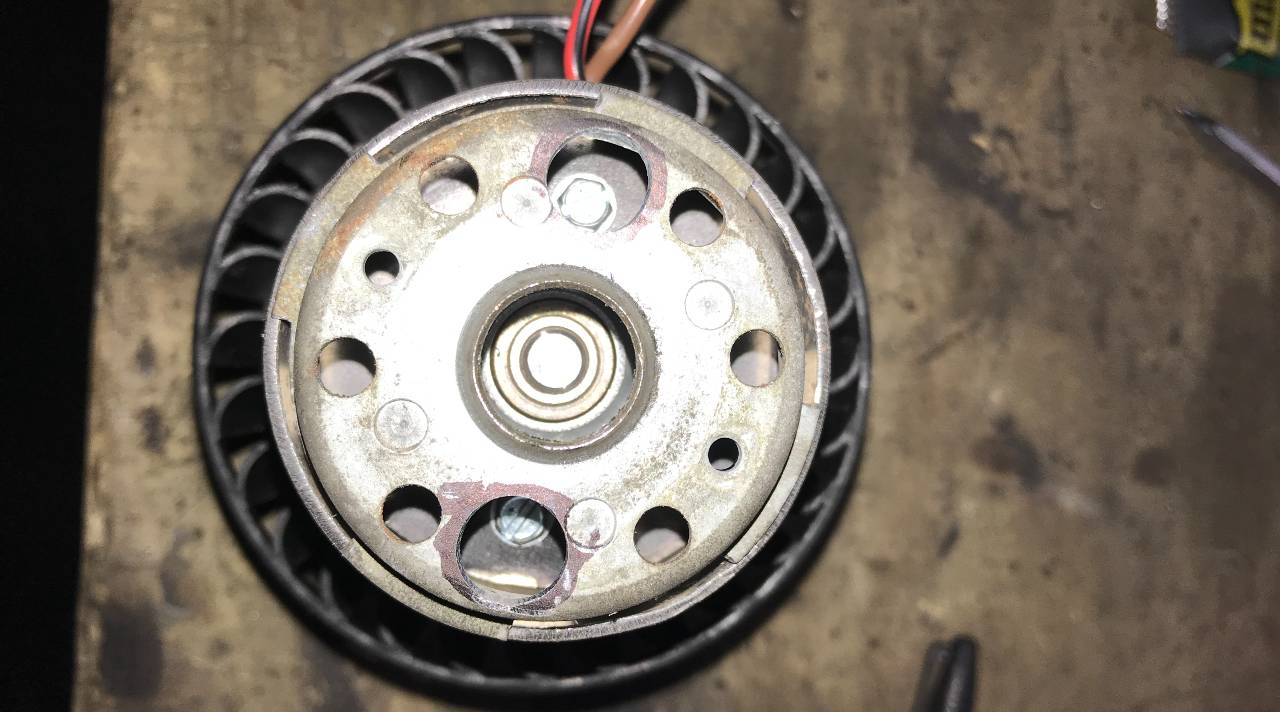
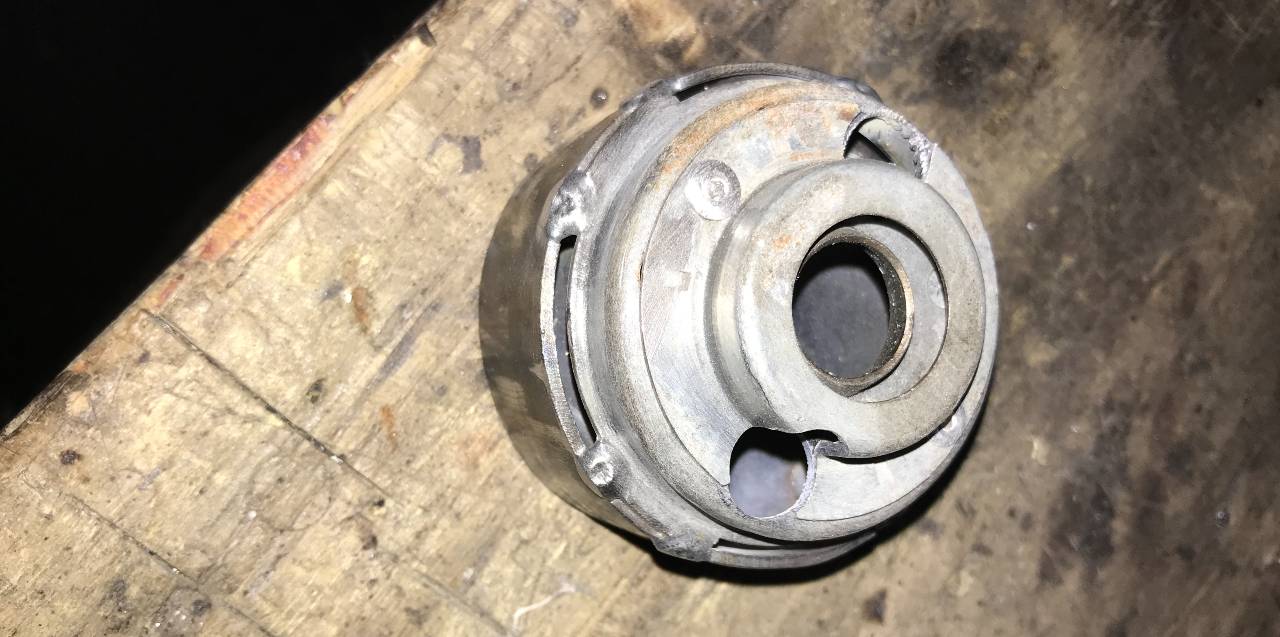
I only wanted to do this once so I not only wanted a brand new motor but the way that I'm going to mount it needs to be reusable. Just in case I need another motor in my lifetime, I'll be able to just simply reuse the custom mount. So, to mount this new motor, the end of the motor must be the same. Luckily, the diameter of both motors is exactly the same and so is the end of the motor. Since this is the case, I was able to use some pieces off of the A/C motor to build the mount.
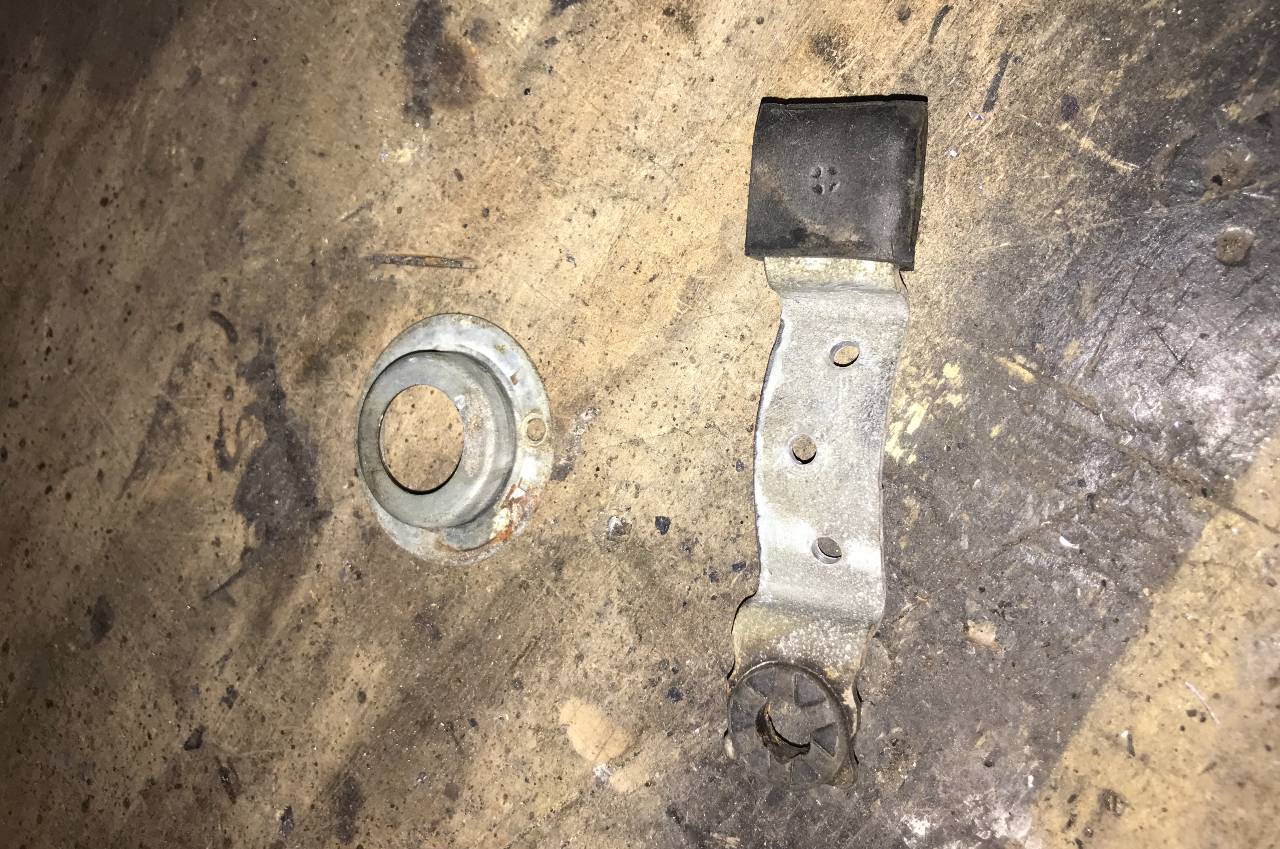
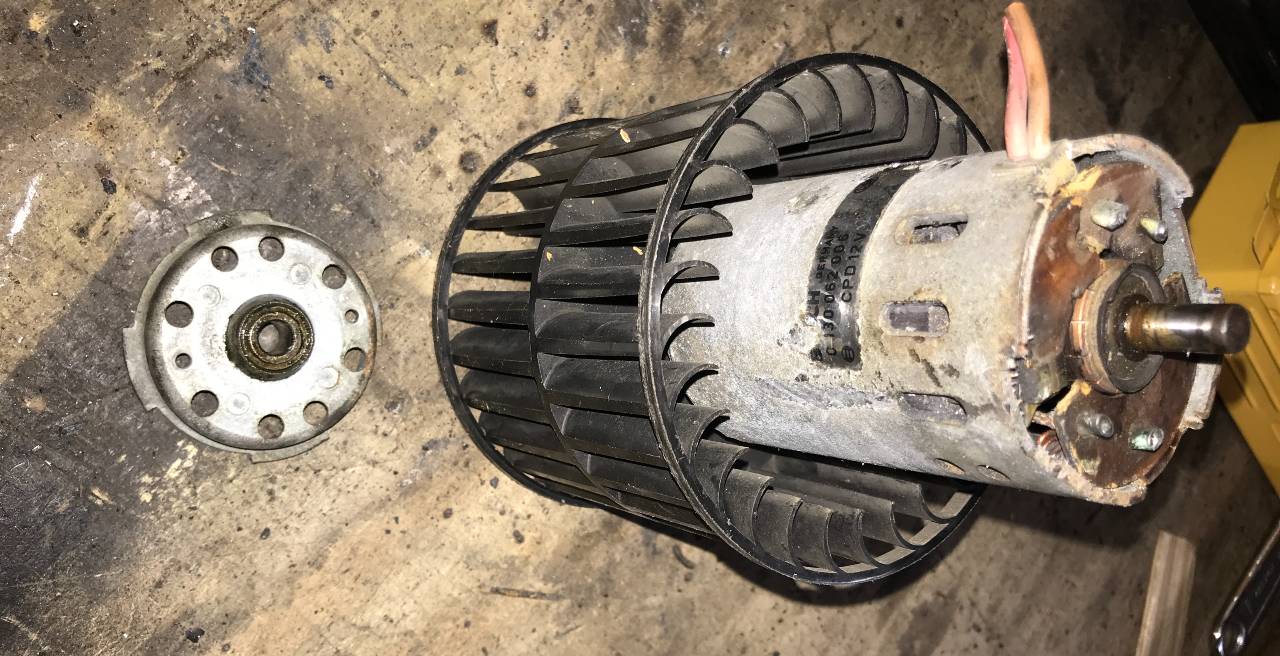
The first thing that I did was drill out the two rivets holding the end cap on the end of the A/C motor. This is needed to seat the end of the motor into the A/C fan housing in the truck. There's a rubber grommet/washer that fits over this too.
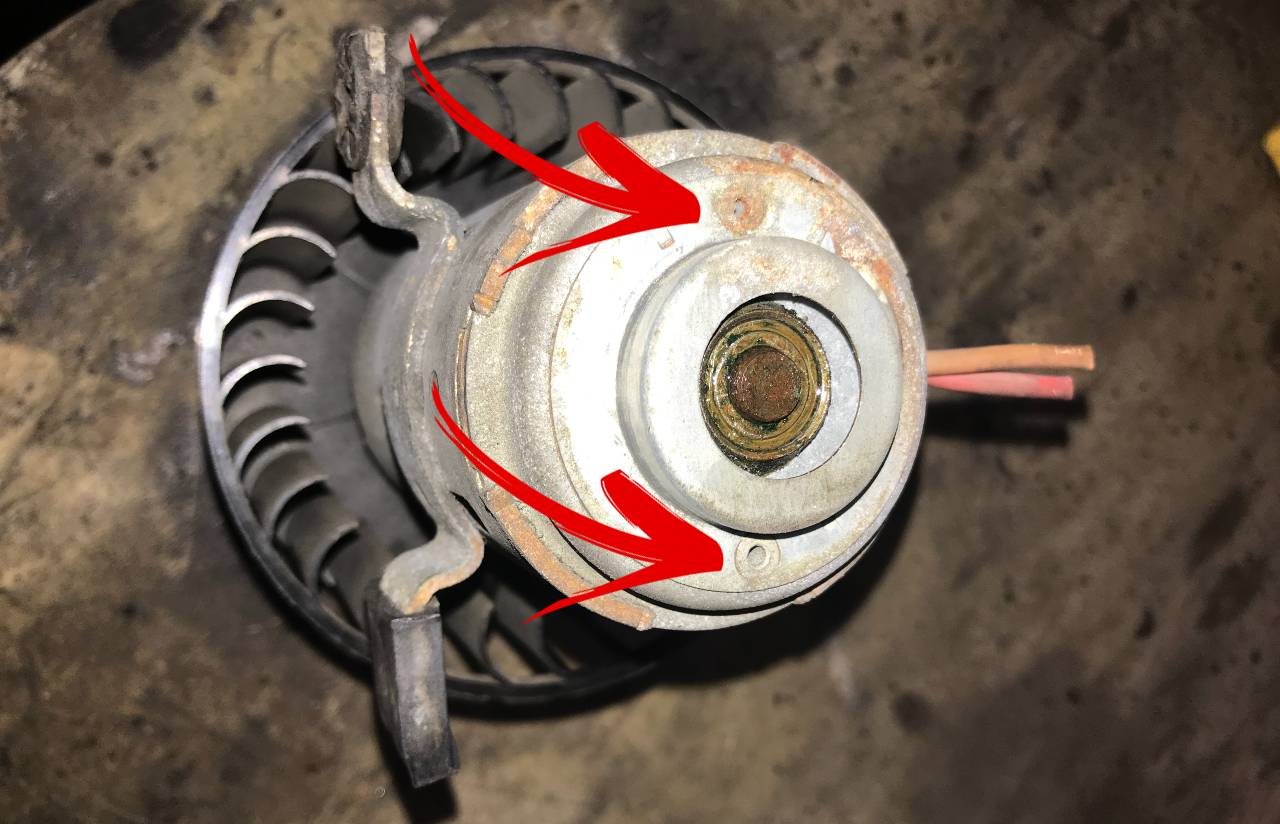
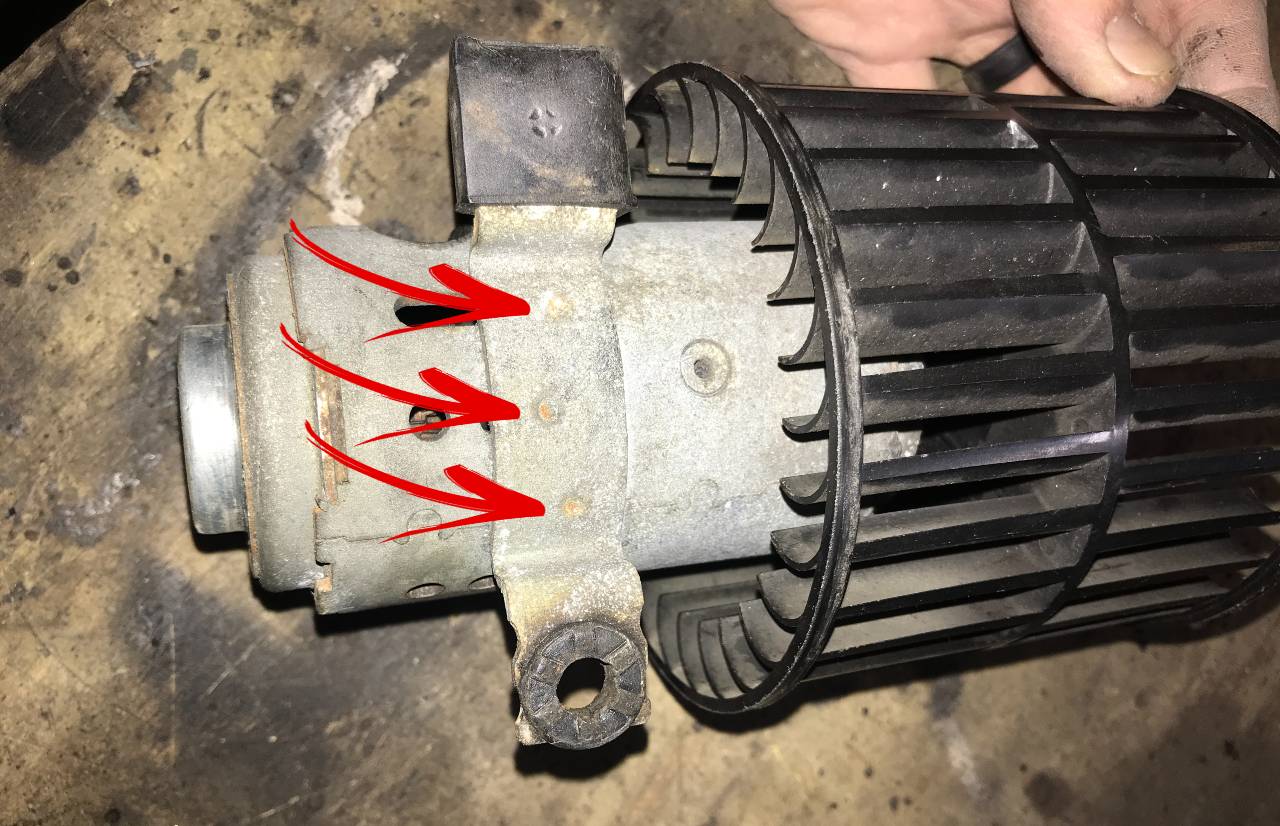
I also drilled out the three spot welds holding the foot on the bottom side of the motor. This is needed for the main mounting point for the motor inside the A/C fan housing.
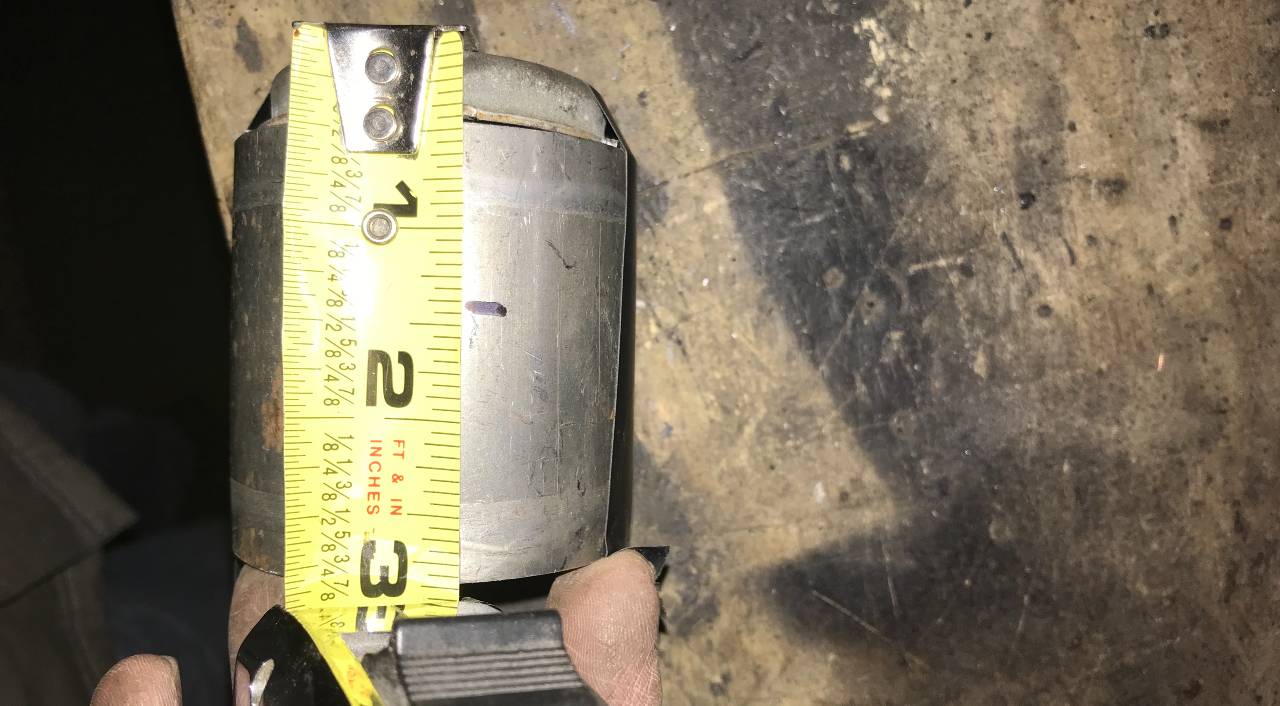
The next step was to figure out how much shorter the new motor is compared to the old motor in reference to the placement of the fan wheel. I centered up the fan wheel on both motors before taking this measurement. Here I measured a difference of 1 3/8". With having built the mount now, I wish I would have added an extra 1/4" to the dimension to better center the fan wheel in the A/C fan housing in the truck. It sits a little close to the one edge of the fan cover at 1 3/8" so I would have gone with 1 5/8" in hindsight. This measurement tells me how long the mount needs to be overall.
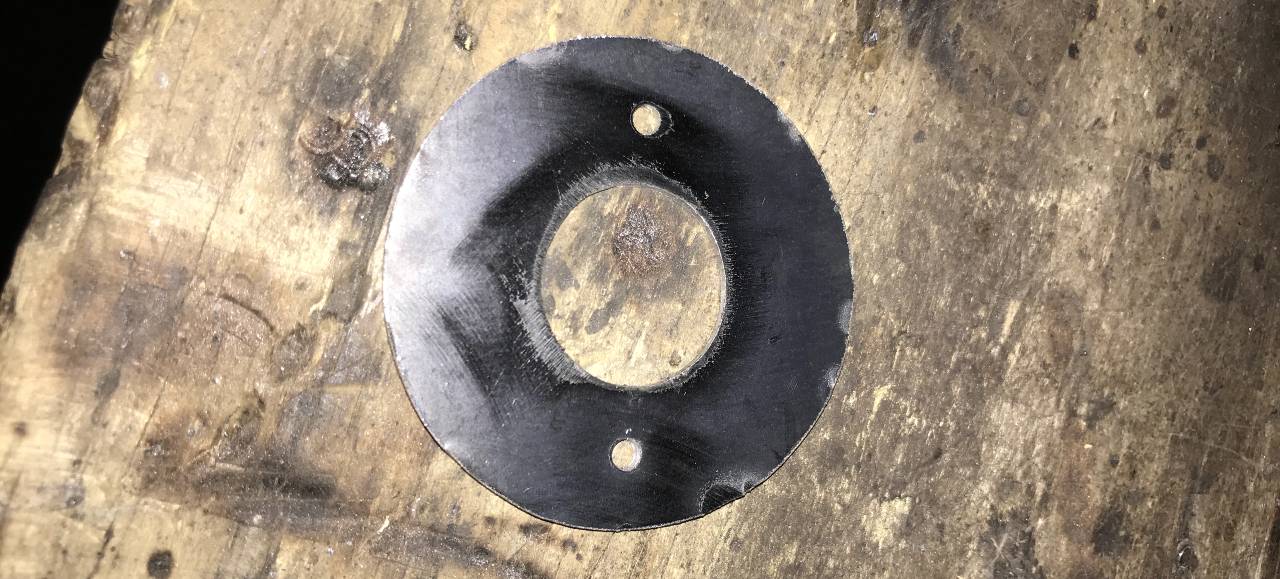
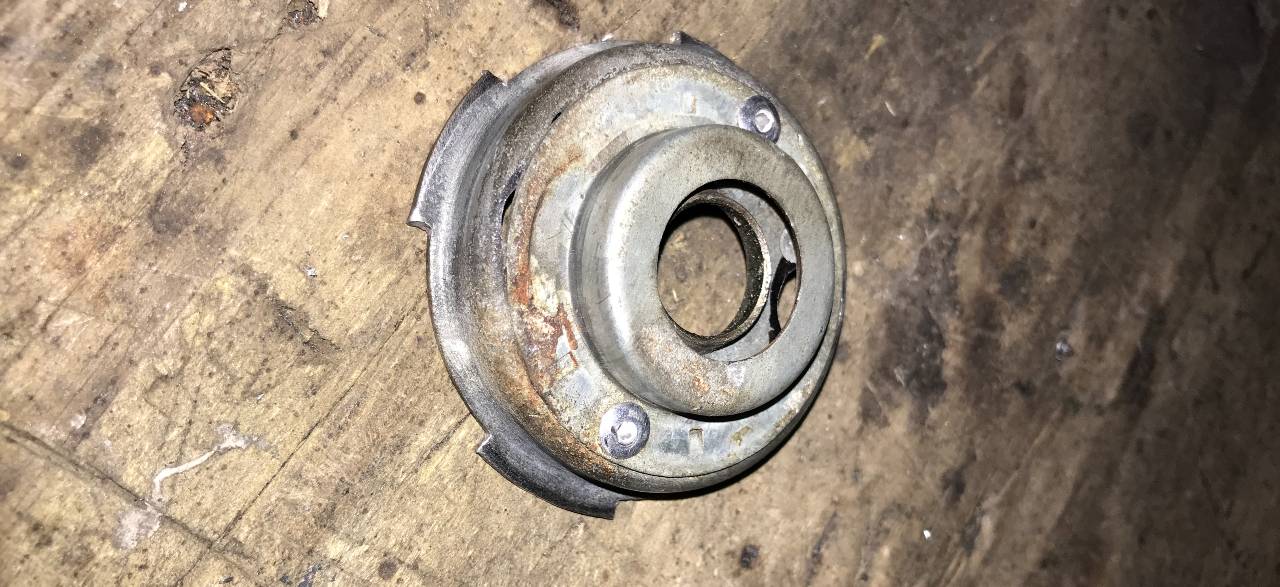
With the length of the mount figured out, I moved on to removing the end cap of the old motor. I wanted to use this as the end cap of the mount so that it can be installed back into the A/C fan housing the same exact way. This is really easy to remove with a chisel and hammer. It doesn't take much to pop it loose from the notches that it's secured in.
I went ahead and removed the bushing from the center of the end cap. This wasn't really necessary but I wanted to get rid of it to keep things clean since it's not needed. I ground off the four small "riveted" spots with a die grinder to remove it and then cleaned up the end cap a bit to prepare for welding.

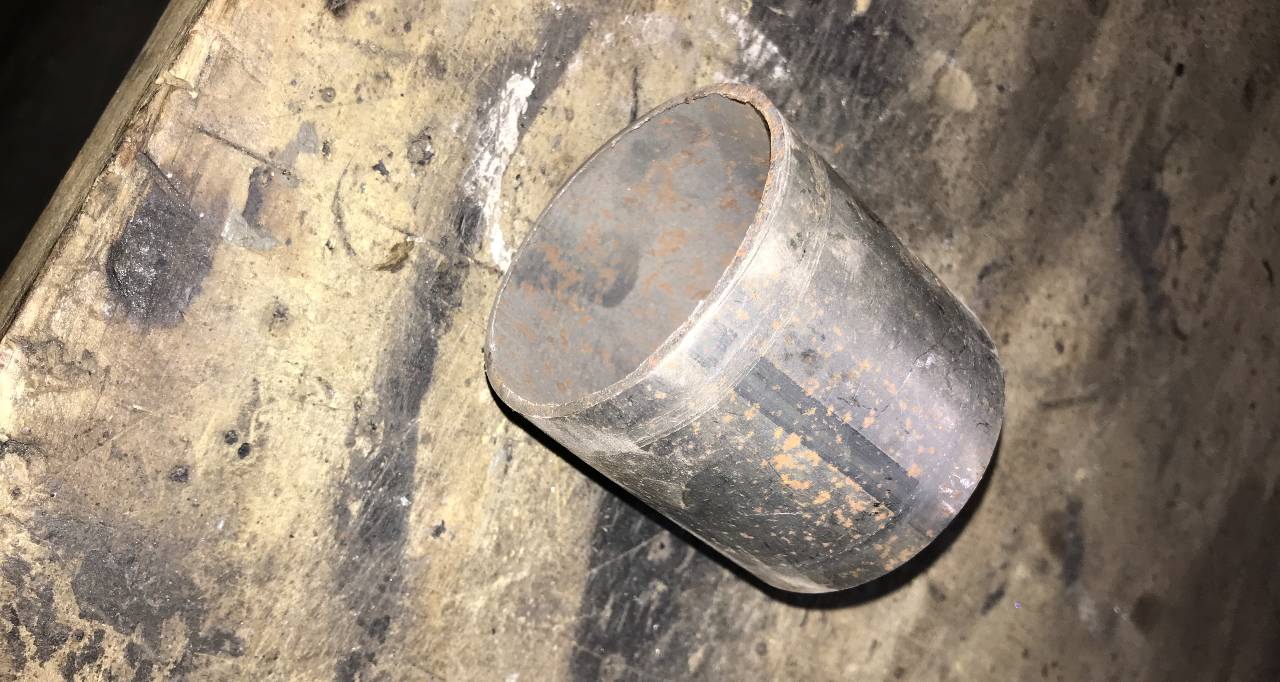
Next, I dug out my bucket of scrap pieces of pipe. I found a piece of 2 1/2" mild steel exhaust pipe that fit great at the end of the motor. I then taped the end cap to the piece of pipe in order to figure out where the pipe needed to be cut in order to get the overall length of 1 3/8" as noted previously.
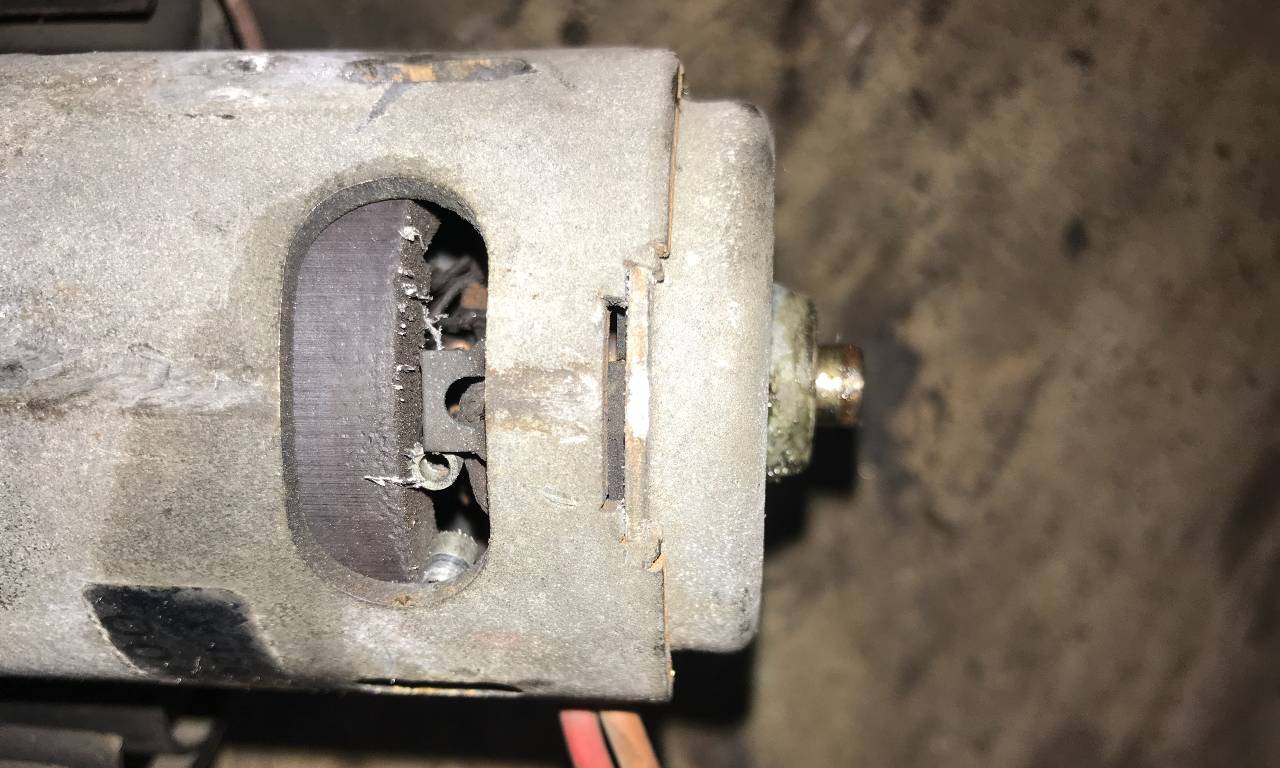
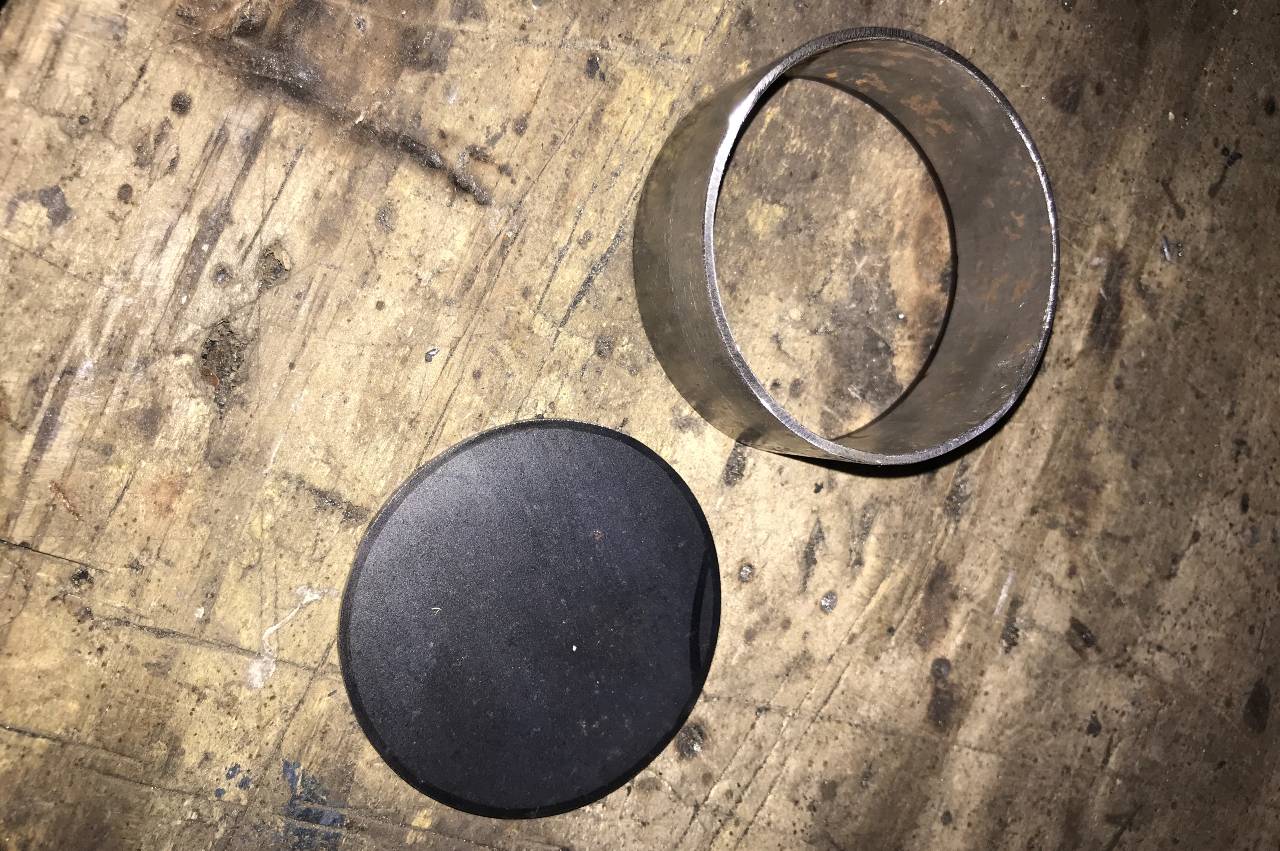
I cut the pipe to length and then cut a piece of flat steel to fit inside the pipe. This piece of flat steel will lay flat on the end of the motor and ultimately screw into the end of the motor.
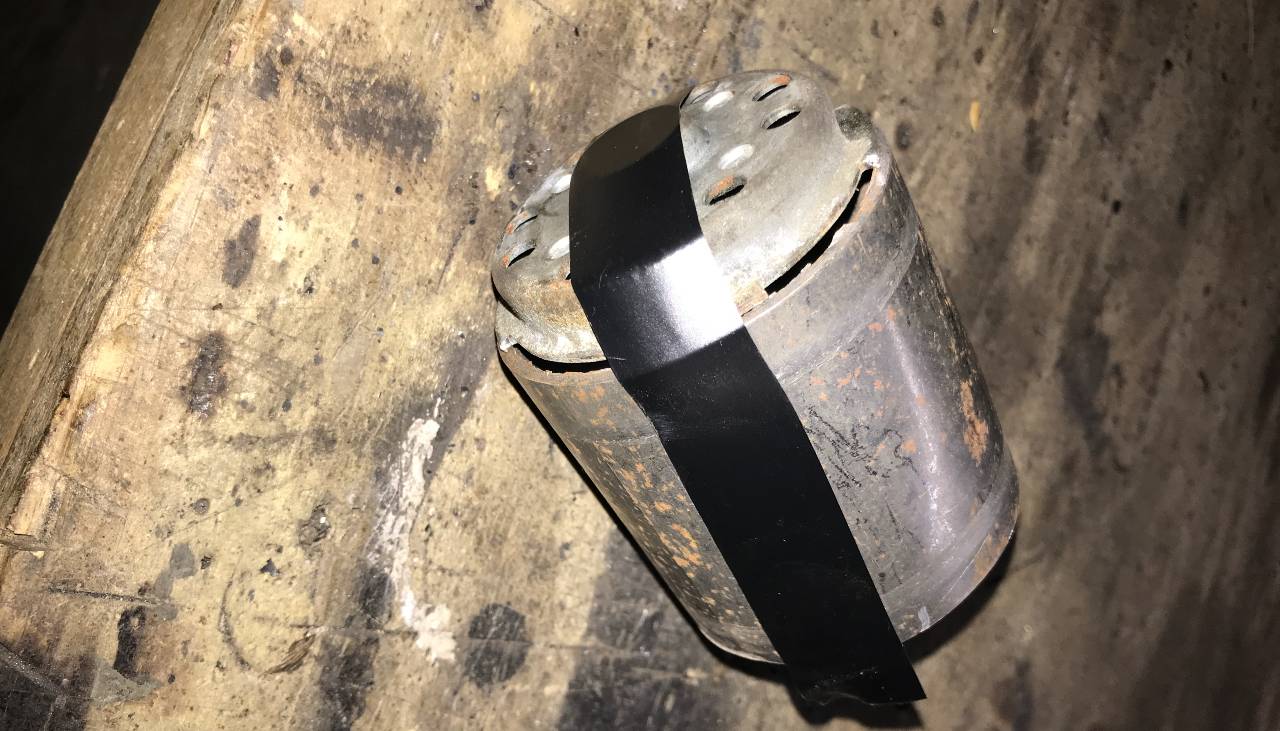
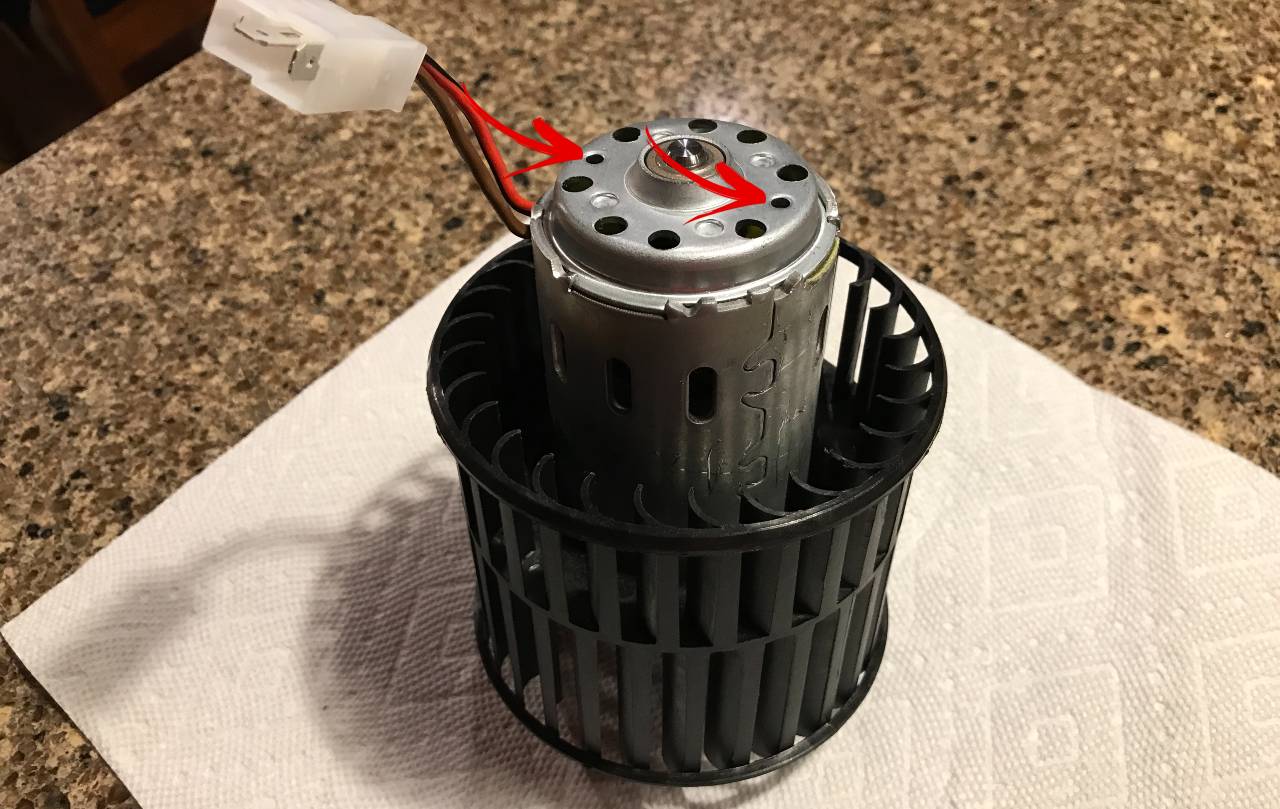
The two small holes pointed out in the image below will be used to screw the mount to the motor.
I screwed the flat piece to the motor and then slid the piece of pipe down over it. I was careful that the screws did not hit anything inside the motor.
Next, I welded the pipe and flat piece together.
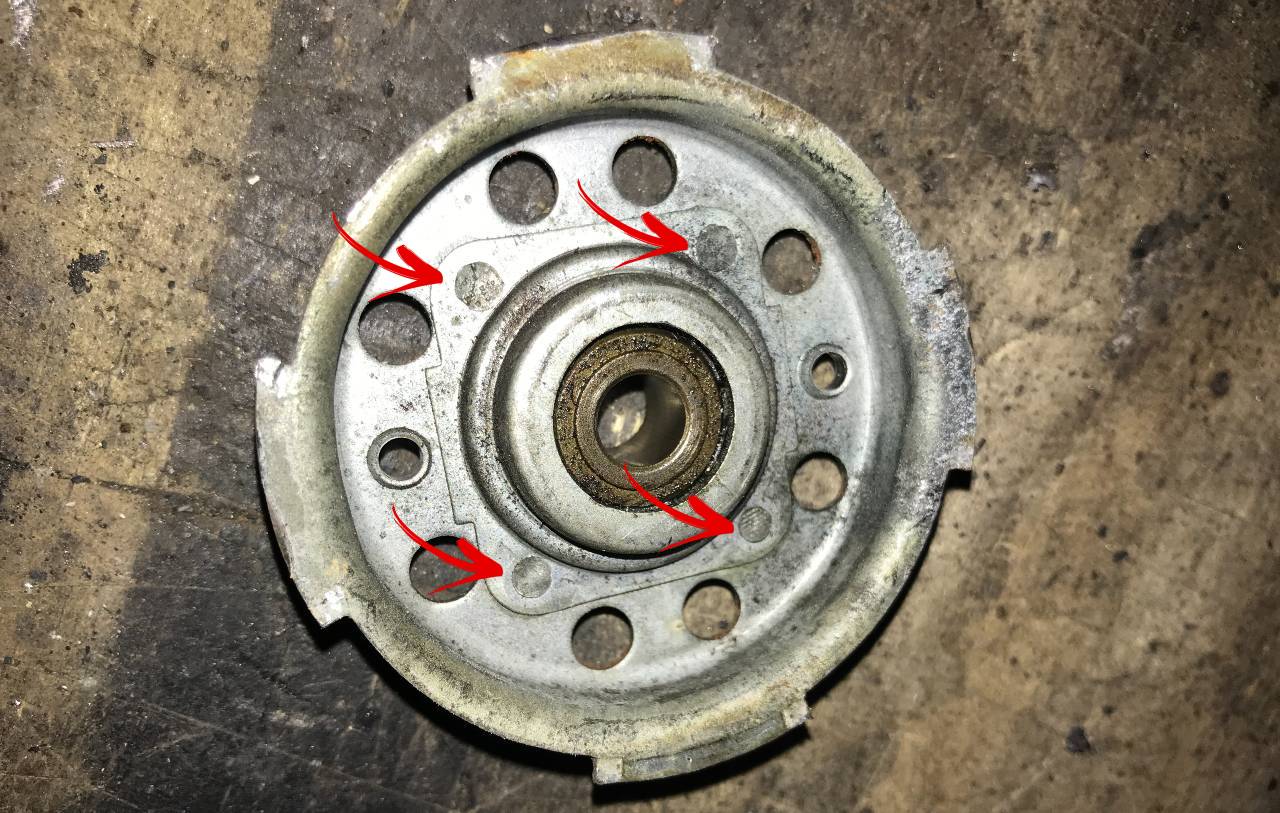
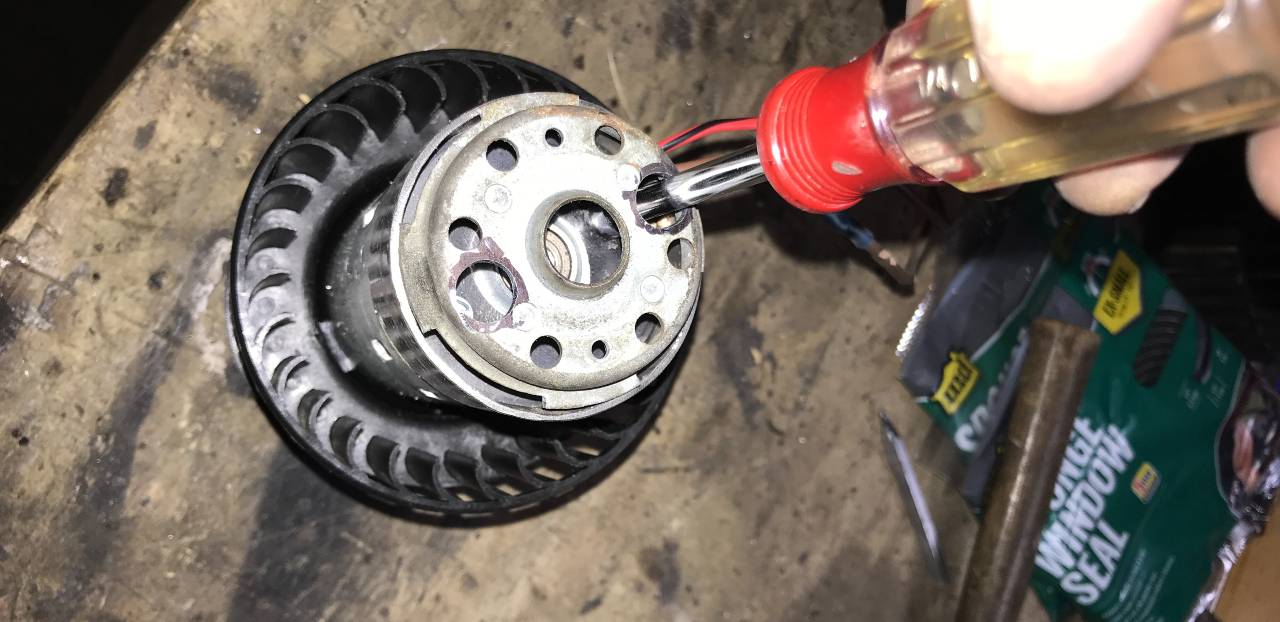
I put the end cap on the end of the pipe and figured out which holes I needed to ream out with my die grinder. Because this is going to screw on to the back of the motor, I needed to make holes for my nut driver to fit.
I then pop riveted the mounting cap back on the the end cap and drilled the holes through it as well.
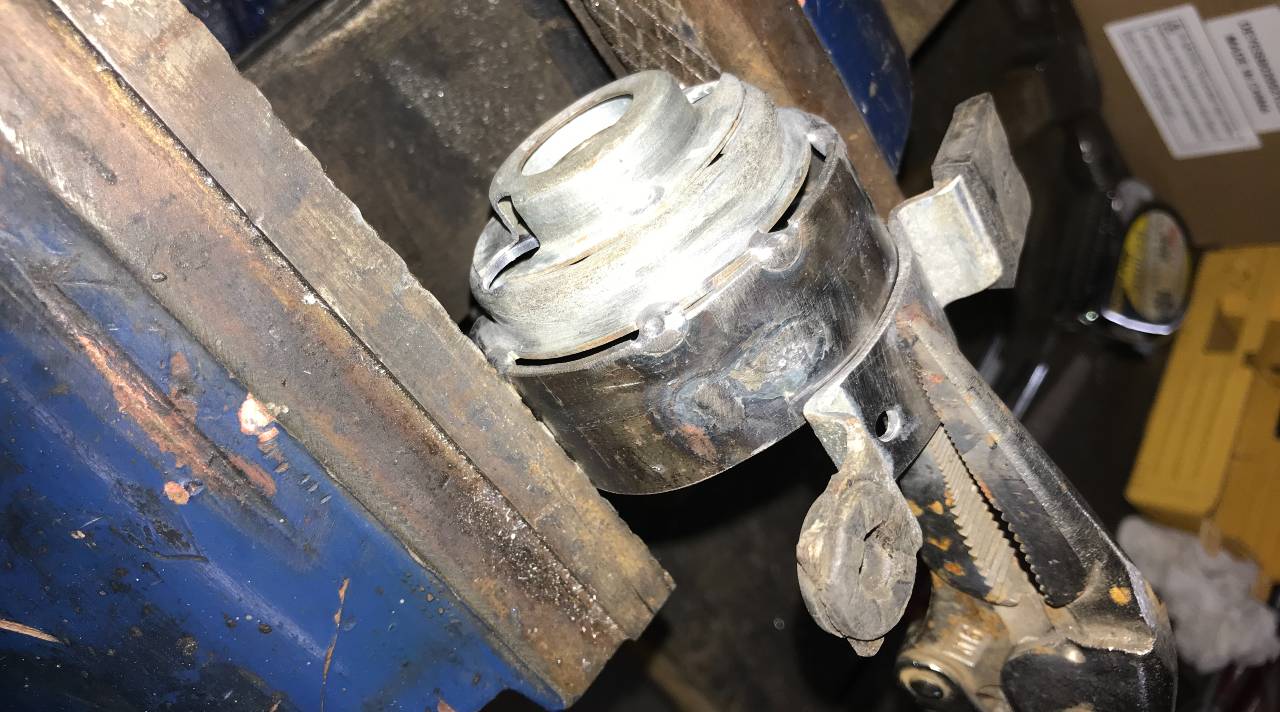
At this point, it was time to weld the end cap onto the mount.
The last step here was to weld the mounting foot onto the new mount. I put the motor with the new mount screwed on into the A/C fan housing in the truck to figure out about where the foot needed to be welded on. I simply scribed a line and then fastened it with some vise grips.
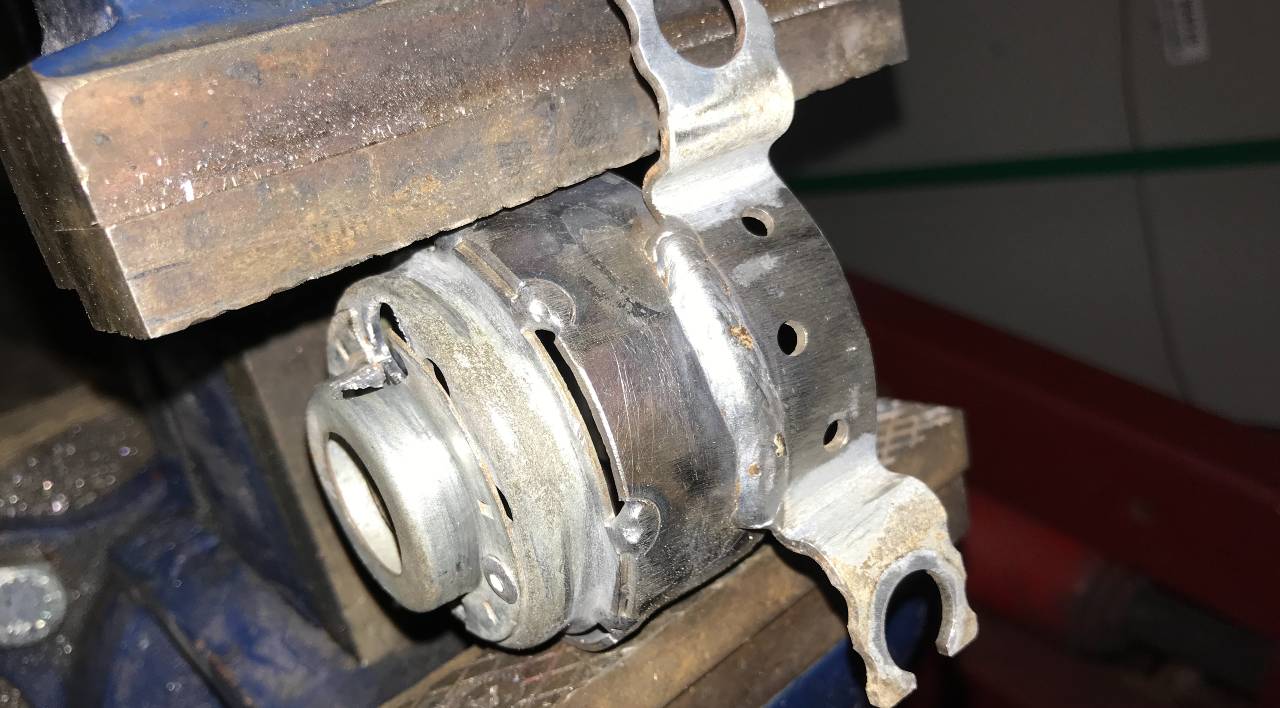
Because the wire harness is so short on the new motor, I cut and spliced the old one into the new one. This also gave me the rubber pass-through needed for re-installation.
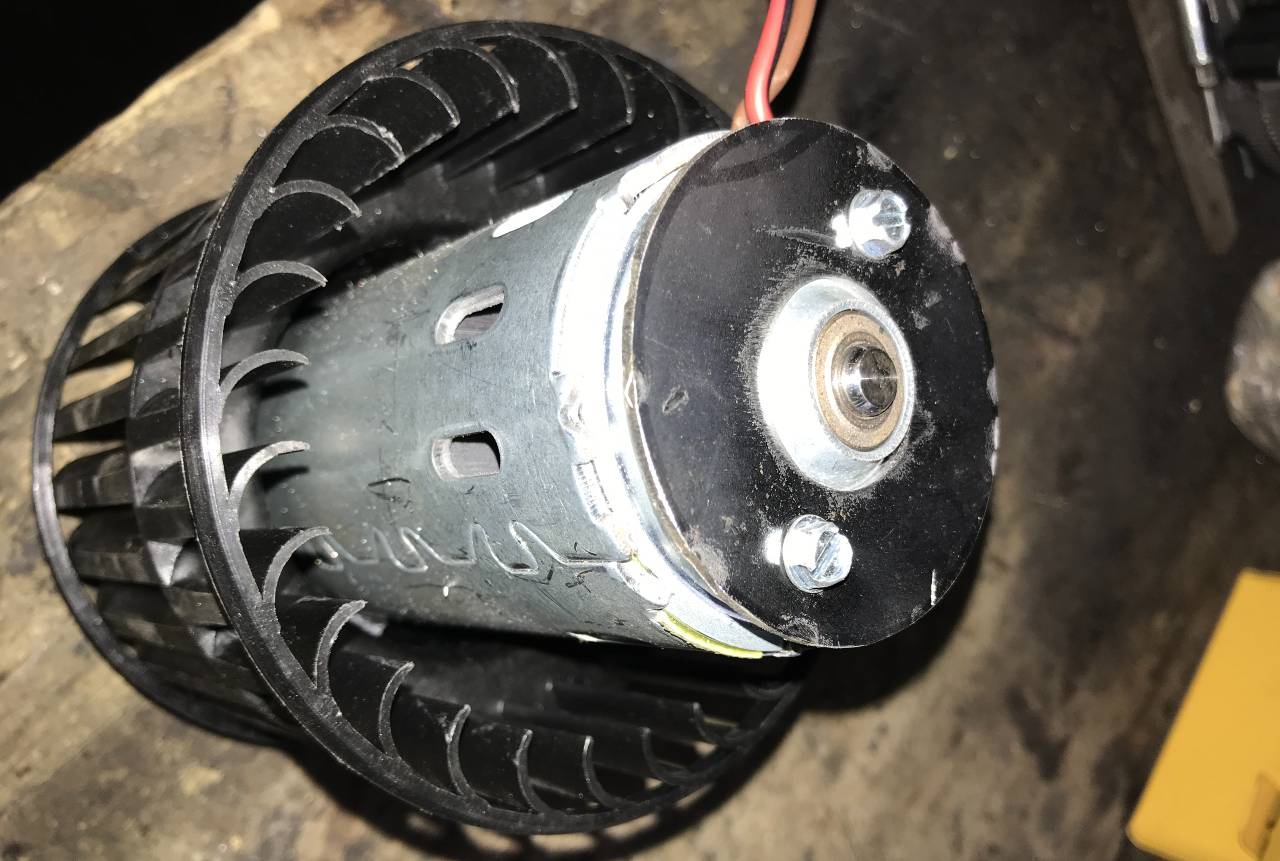
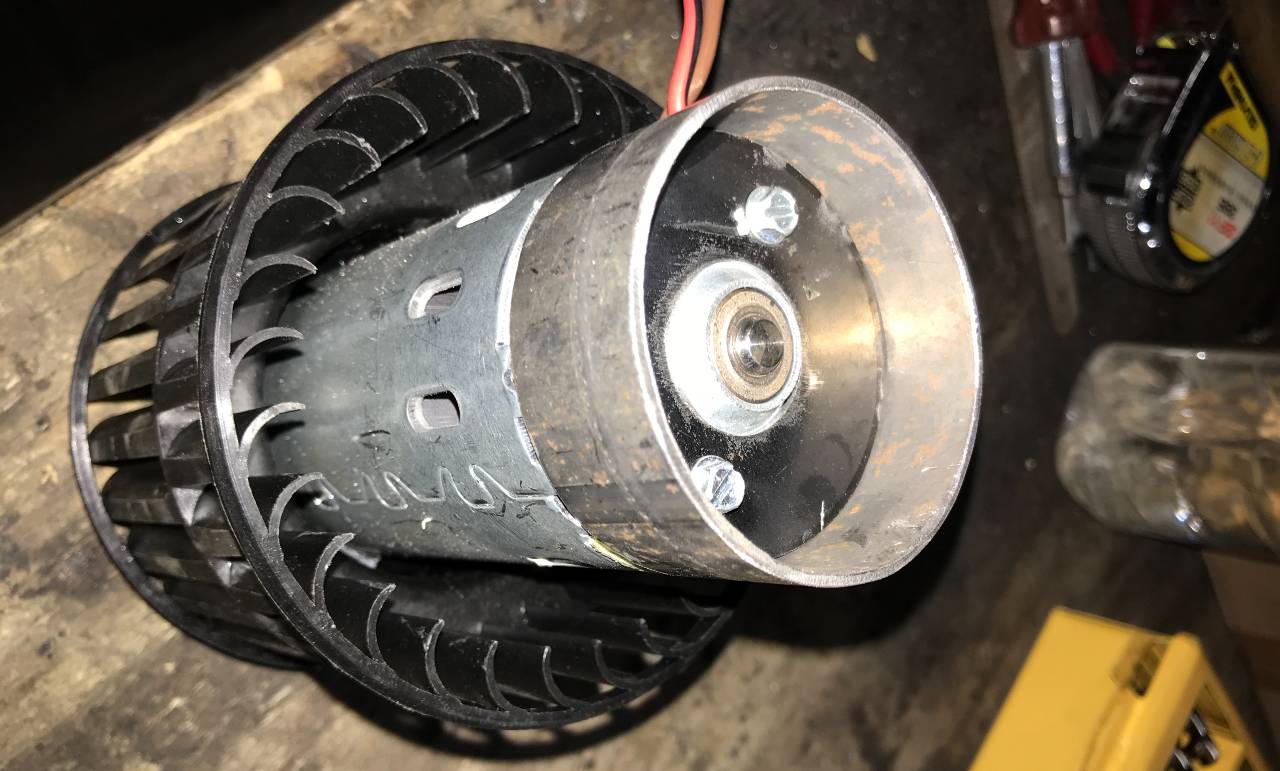
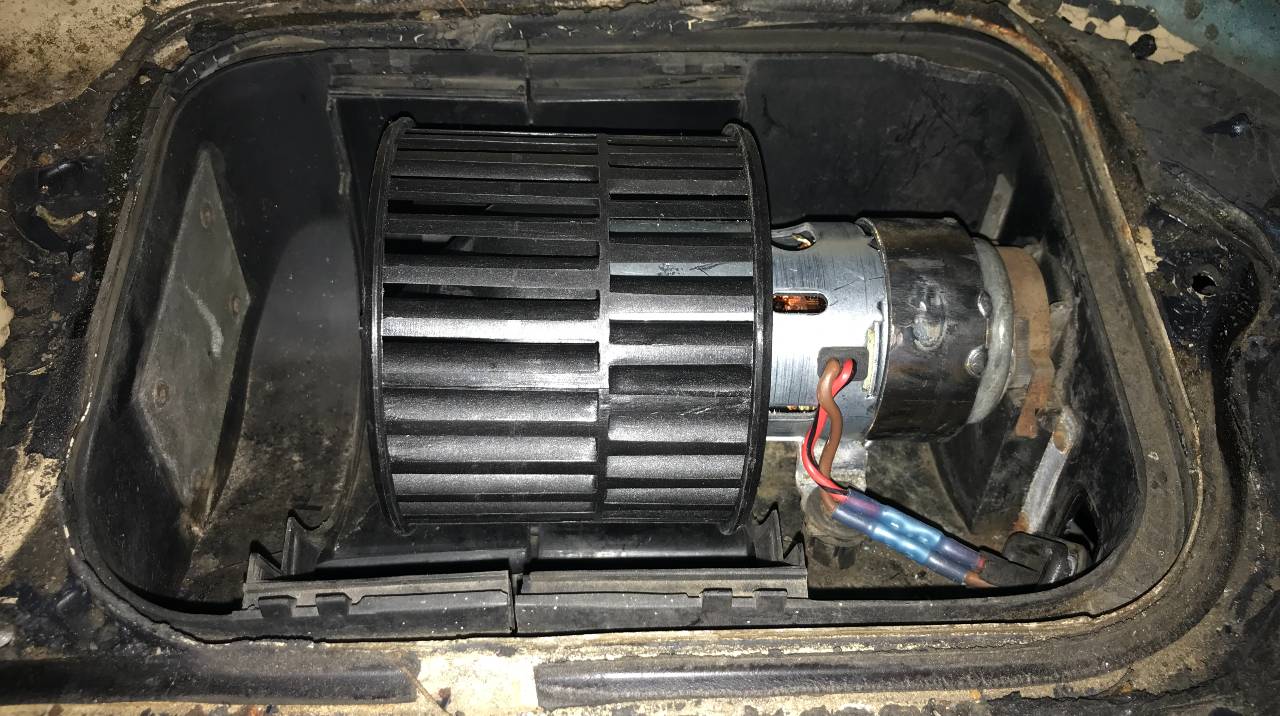
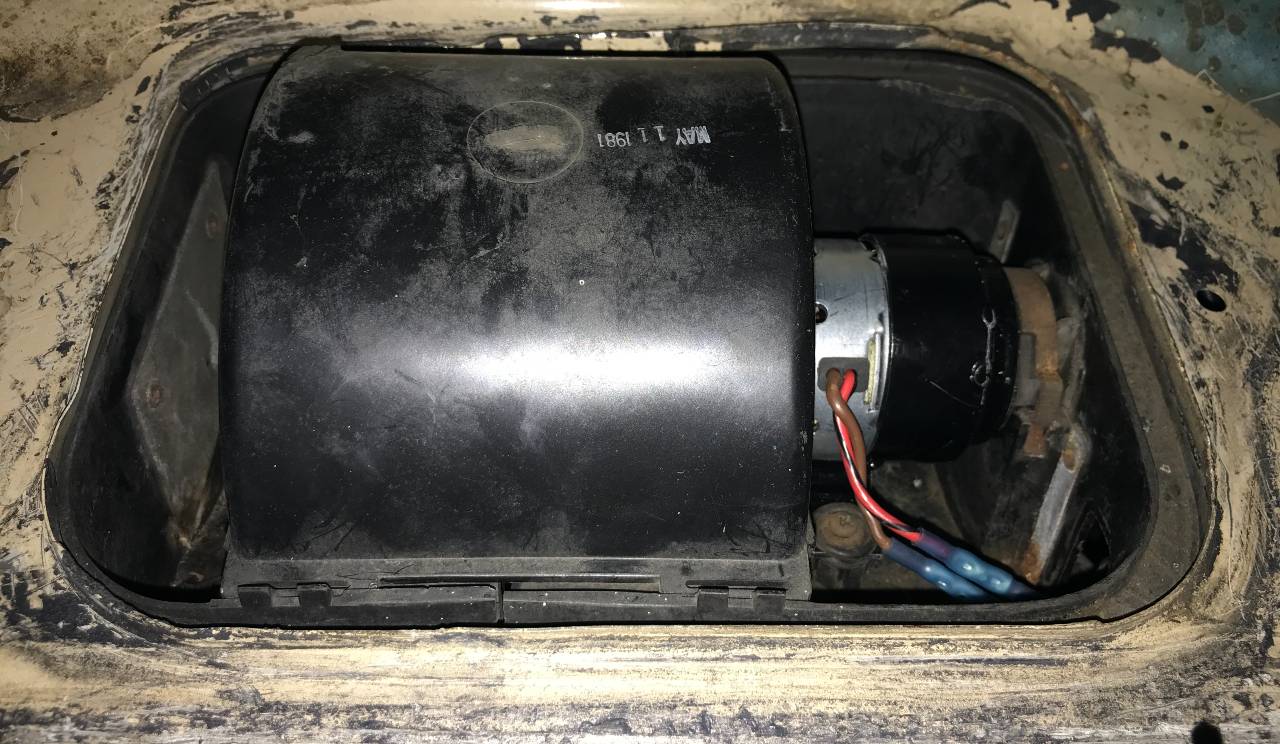
It's finally time to install the motor and test it out. I screwed the mount onto the new motor and put the rubber grommet/washer on the end cap and installed it.
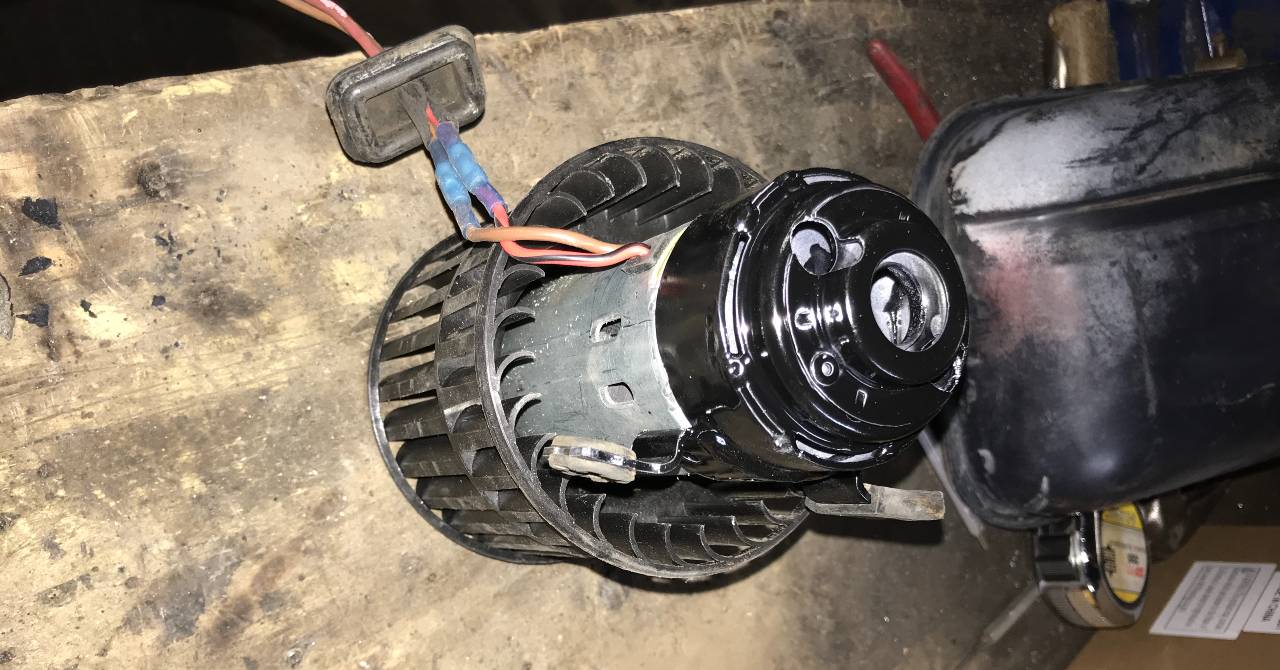
The new motor ran great so I took everything back out and painted the new mount.
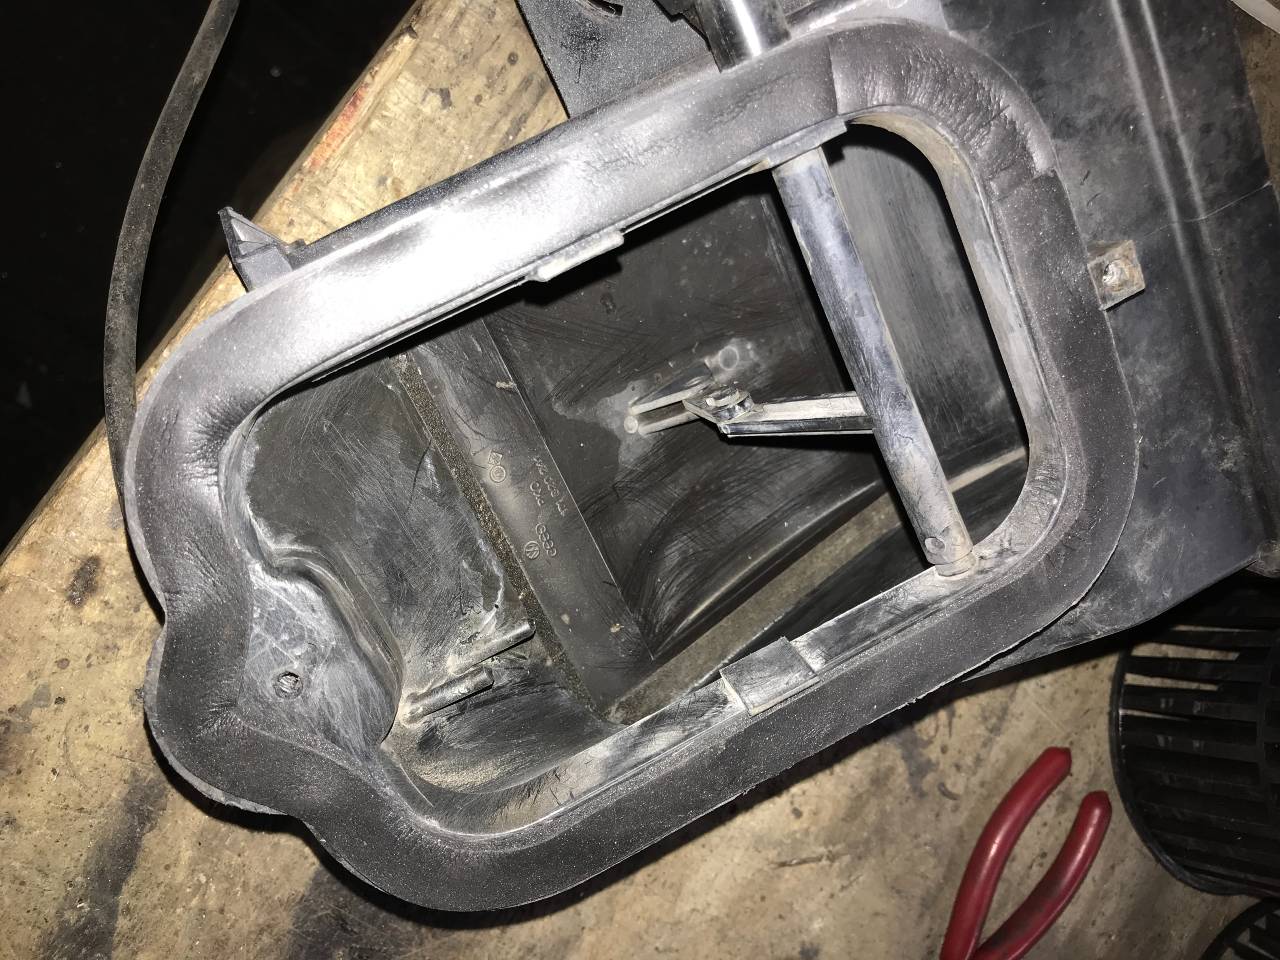
I also put new seals on the covers. I picked up some 1/8" - 1/4" Sponge Window Seal from Ace Hardware.

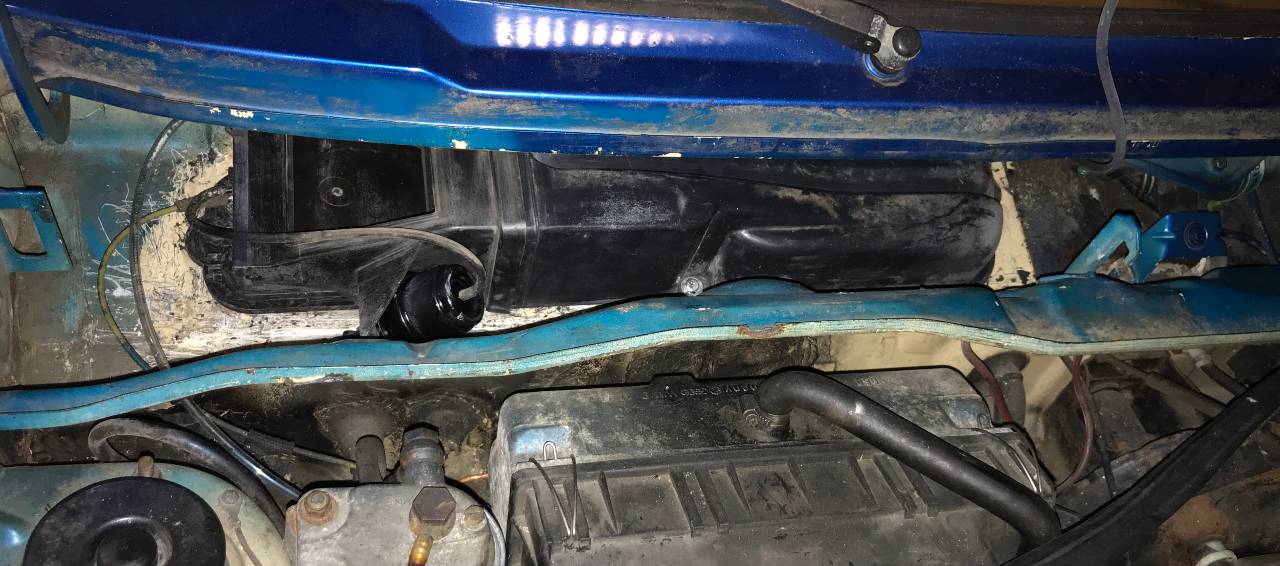
I cleaned up the old shit that was smeared through the rain tray area and installed the new motor for the final time along with the covers.
That would have been it in a perfect world but as what typically happens, my blower fan resistor burnt out along with the motor. So, now it's time to solve problem number two.
The New Blower Motor Resistor
Just like with the new motor, I wanted to come up with a solution that involved a brand new part and one that I can buy again in the future if needed. The MK1 blower fan resistor can no longer be purchased brand new.
I came across this VW Vortex thread where someone used a blower fan resistor for a 1991 Ford Ranger. I liked that lead so I did the same. I'm sure there are several out there that could work. The key is to find a resistor for a four-speed fan switch. The first three speeds go through the resistor and the fourth is straight power. The part is definitely readily available at multiple places. As mentioned in the thread, you can find it at Napa Auto Parts but I also looked it up at Advance Auto Parts as well. Here are the part links for both the resistor and resistor pigtail:
- Resistor at Advance Auto Parts (Part #: RUC1027)
- Resistor pigtail at Advance Auto Parts (Part #: PTA1009)
- Resistor at Napa Auto Parts (Part #: ECH BR223)
- Resistor pigtail at Napa Auto Parts (Part #: ECH EC4)
Using a '91 Ford Ranger resistor is not as straight-forward as it reads in that thread however. The existing Rabbit resistor connector does not plug into the Ranger resistor so I'm glad I got the pigtail too just in case. Also, the Ranger resister is larger than the Rabbit one so some trimming is required. As mentioned in the thread, the middle two fan speeds are reversed but that's easy to address with the Ranger resistor pigtail.
So given all of that, here's how I solved problem number two.
I started by removing the glove box.
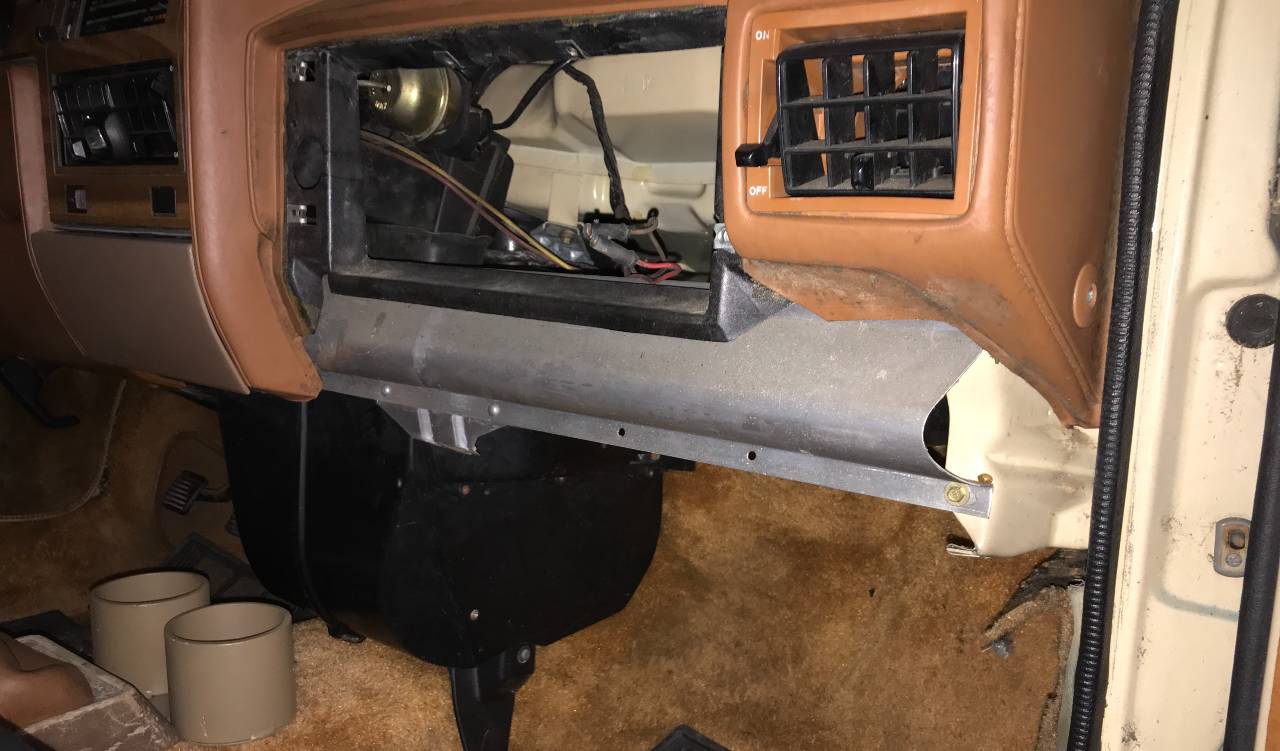
On the passenger side of the airbox housing, there is a cover held on by six phillips head screws.
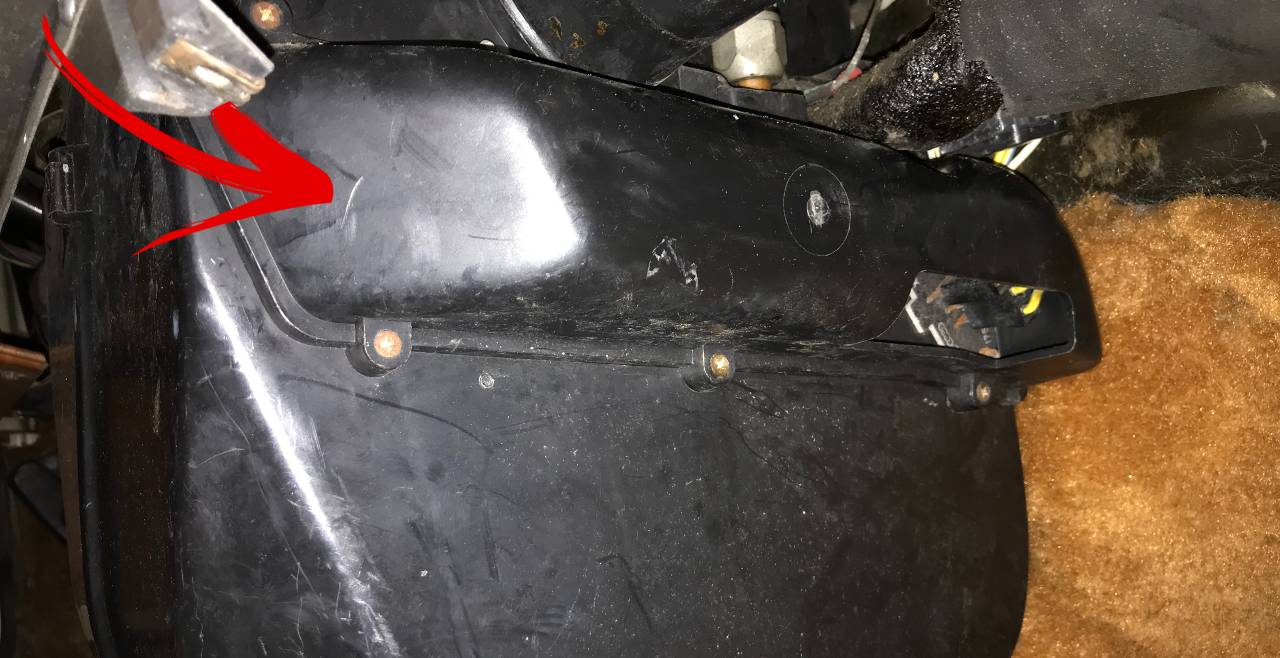
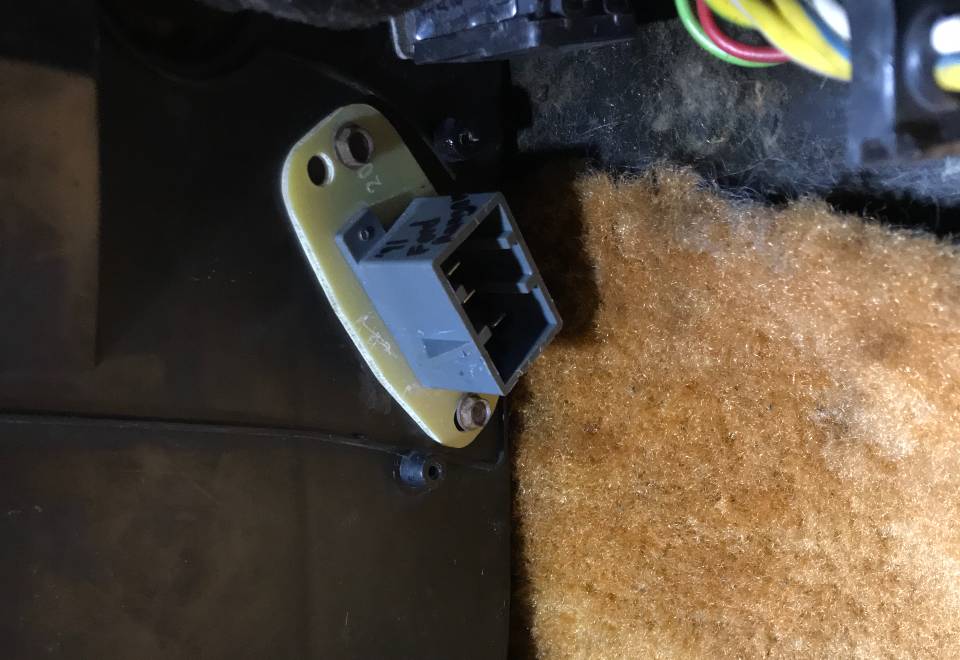
Under that cover is the resistor.
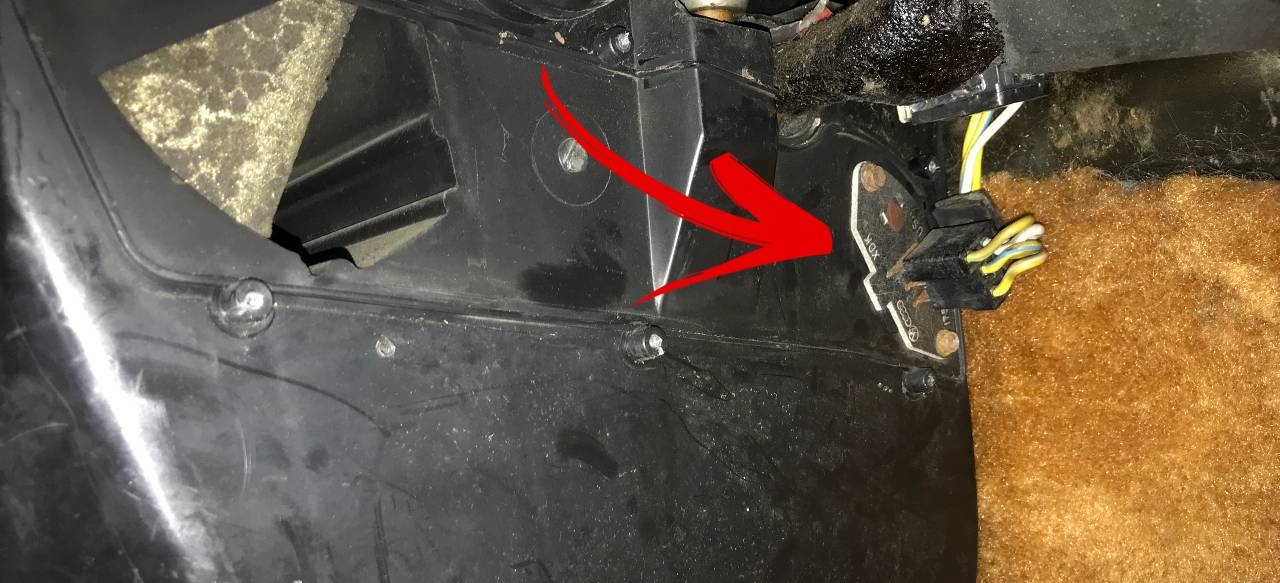
I removed the resistor and started test fitting the Ranger resistor. The first thing I did was ground off the little tab so that the Ranger resistor could sit flat.
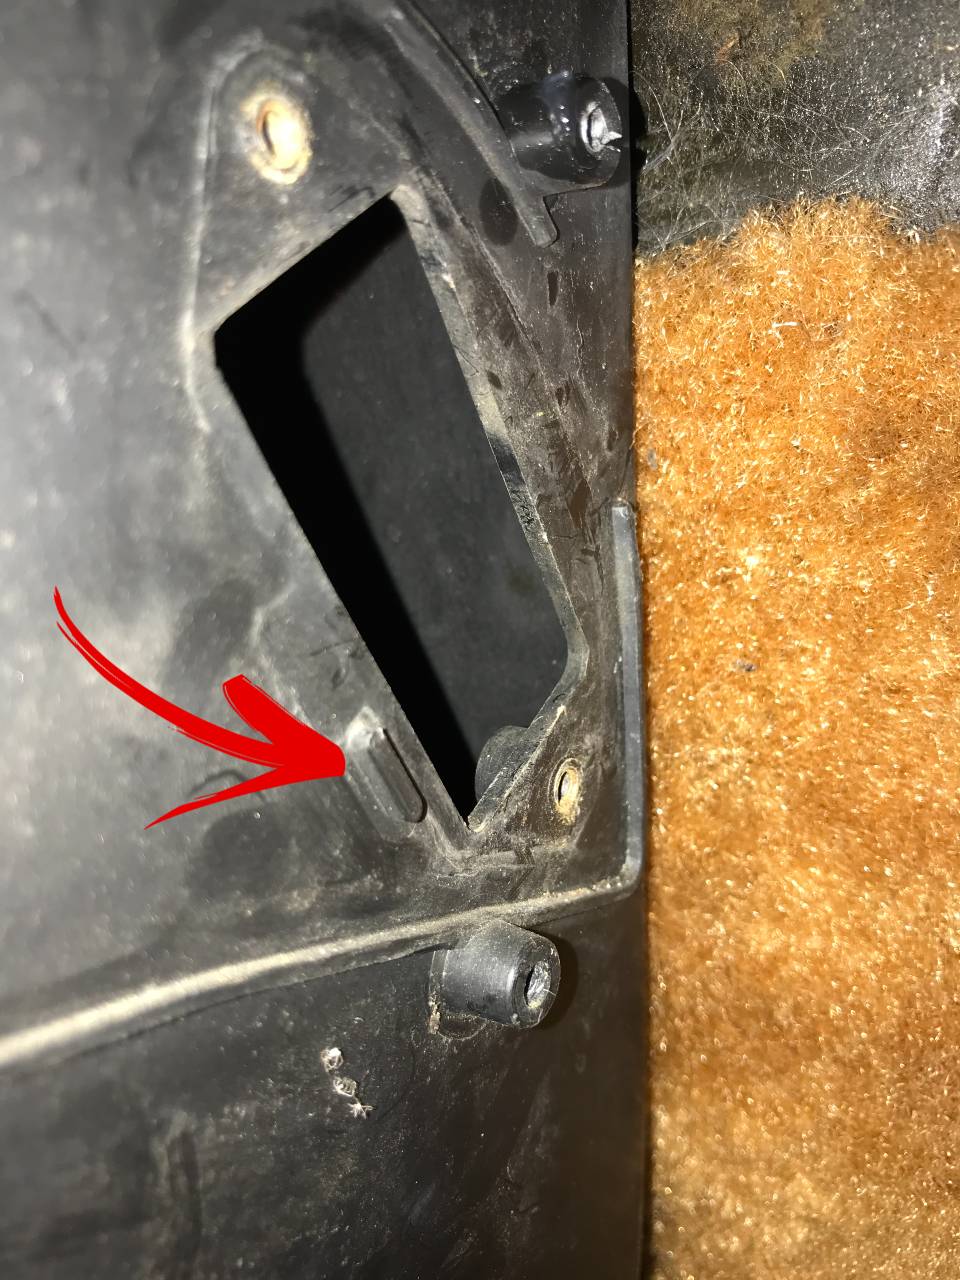
I then guessed about where I needed to make/adjust the mounting holes in the resistor. In the end, I had both holes (pointed out below) elongated to make it easier to get the resistor into the right position. I also used a grinder with a flap disc to trim and round off the edges of the resistor as you can also see below.
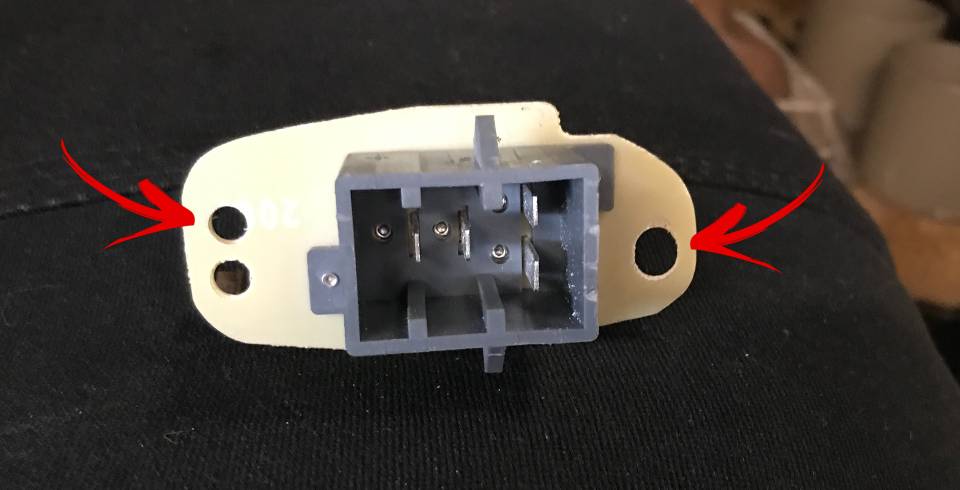
Once the adjustments are made, the Ranger resister does fit nicely.
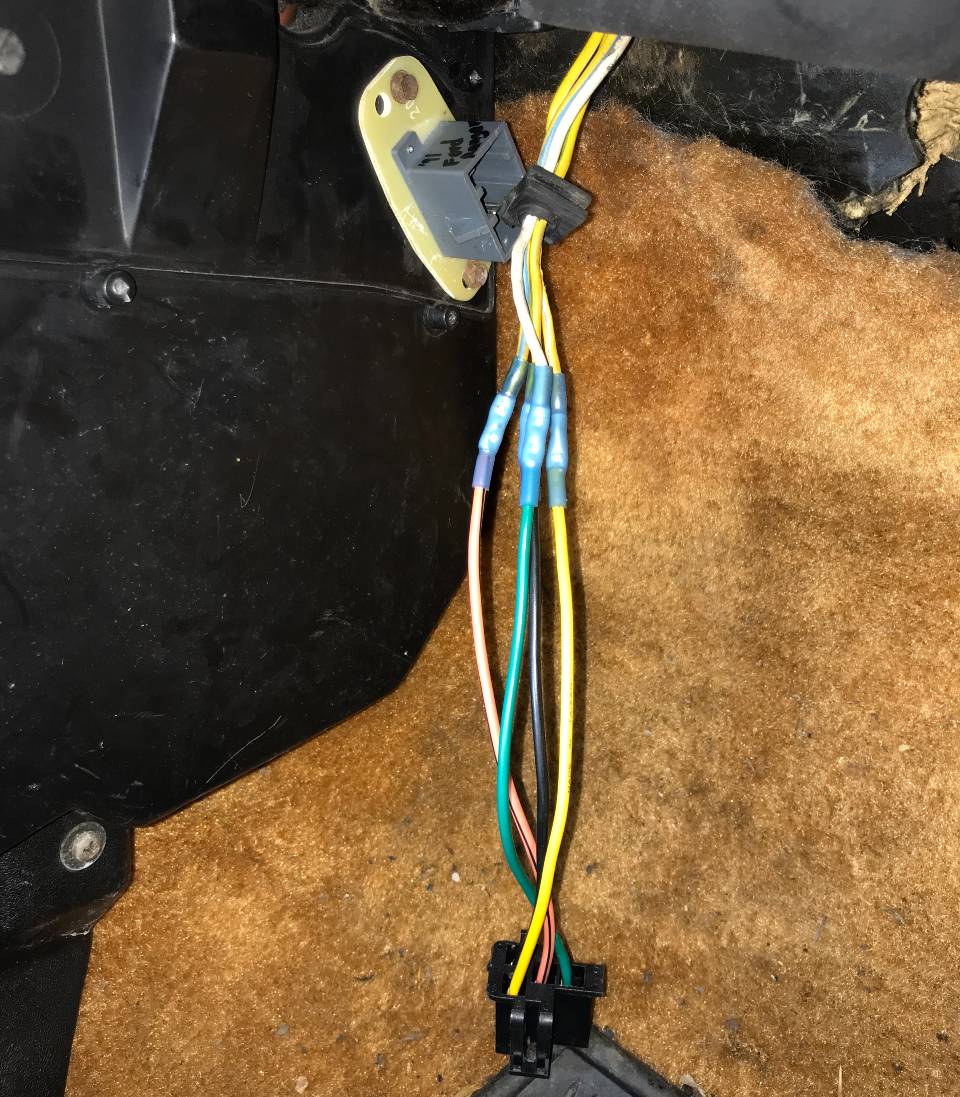
The last step was to splice in the new pigtail. Through trial and error, I figured out which wires went where so that the fan speeds are correct. Based on my Rabbit harness and Ranger resistor pigtail, the wires are:
- Rabbit white to pigtail green
- Rabbit yellow with blue stripe to pigtail red
- Rabbit yellow with green stripe to pigtail black
- Rabbit yellow with gray stripe to pigtail yellow
And that's it. I reinstalled the cover and glove box and now have a working, brand new blower motor and blower motor resistor. I'm now done until the next thing breaks...